- TOP >
- SHIKISAI GeoTIFF >
- SHIKISAI GeoTIFF-Cryosphere
SHIKISAI GeoTIFF-Cryosphere | Land | Ocean | Atmosphere | Level1B
Level-2 / Level-3 Cryosphere Products
Click on the product name to see its details.
If there are SD arrays (data sets) for multiple observation wavelengths, a representative one is shown.
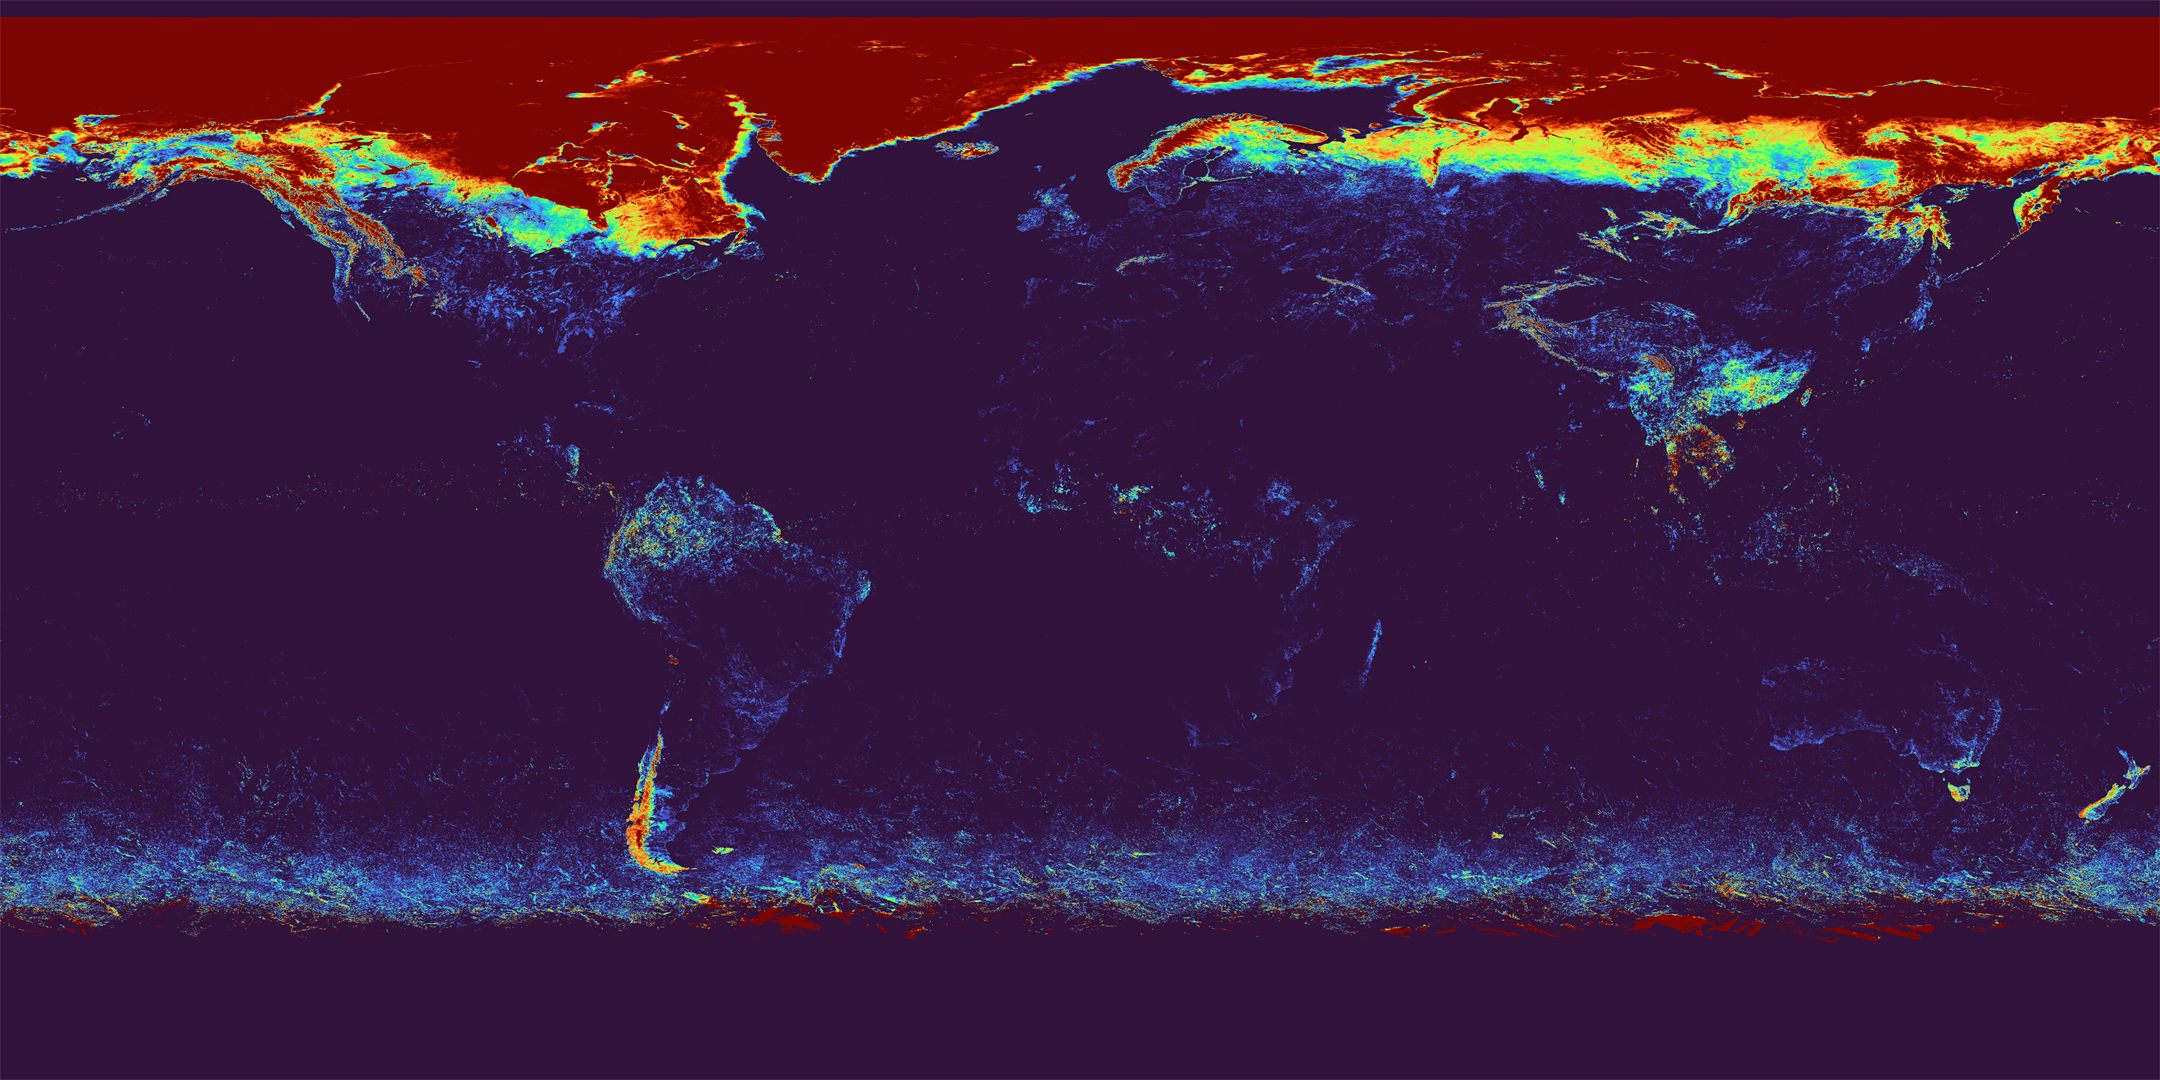
SICE (Snow and Ice covered area)
Level-2 and Level-2 statistical products are provided as HDF5 files by tile units.
(For more information on tile products, see FAQ https://shikisai.jaxa.jp/faq/faq0080.html.)
Level-3 products are provided as a global area product for each geophysical quantity.
G-Portal Processing Request: GeoTIFF(Individual files)
JASMES: NetCDF4
Physical quantity
SICE (Snow and Ice covered area)
TThe extent of global snow and ice cover
Resolution
Level-2: 250m, 1km
Level-2 statistics: 1km
Level-3: 1/24deg (4.6km)
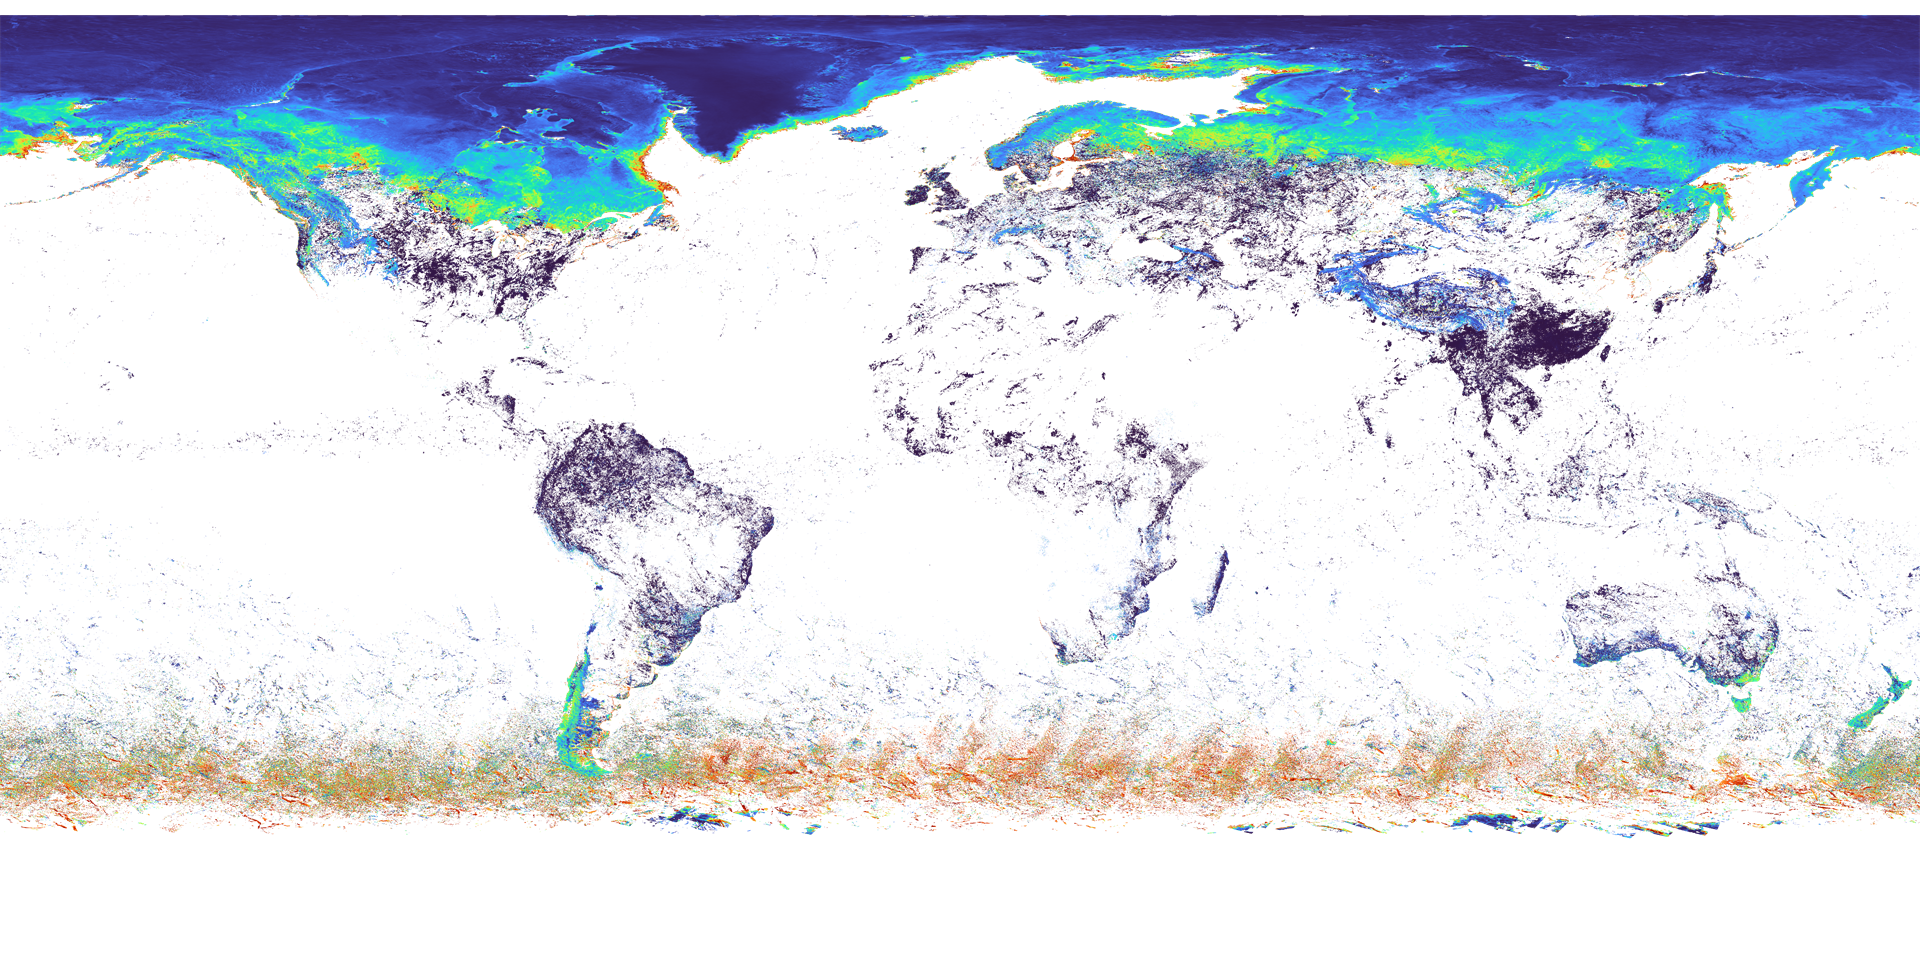
Level-2
Level-2 statistics
(8-day)
Level-2 statistics
(1-month)
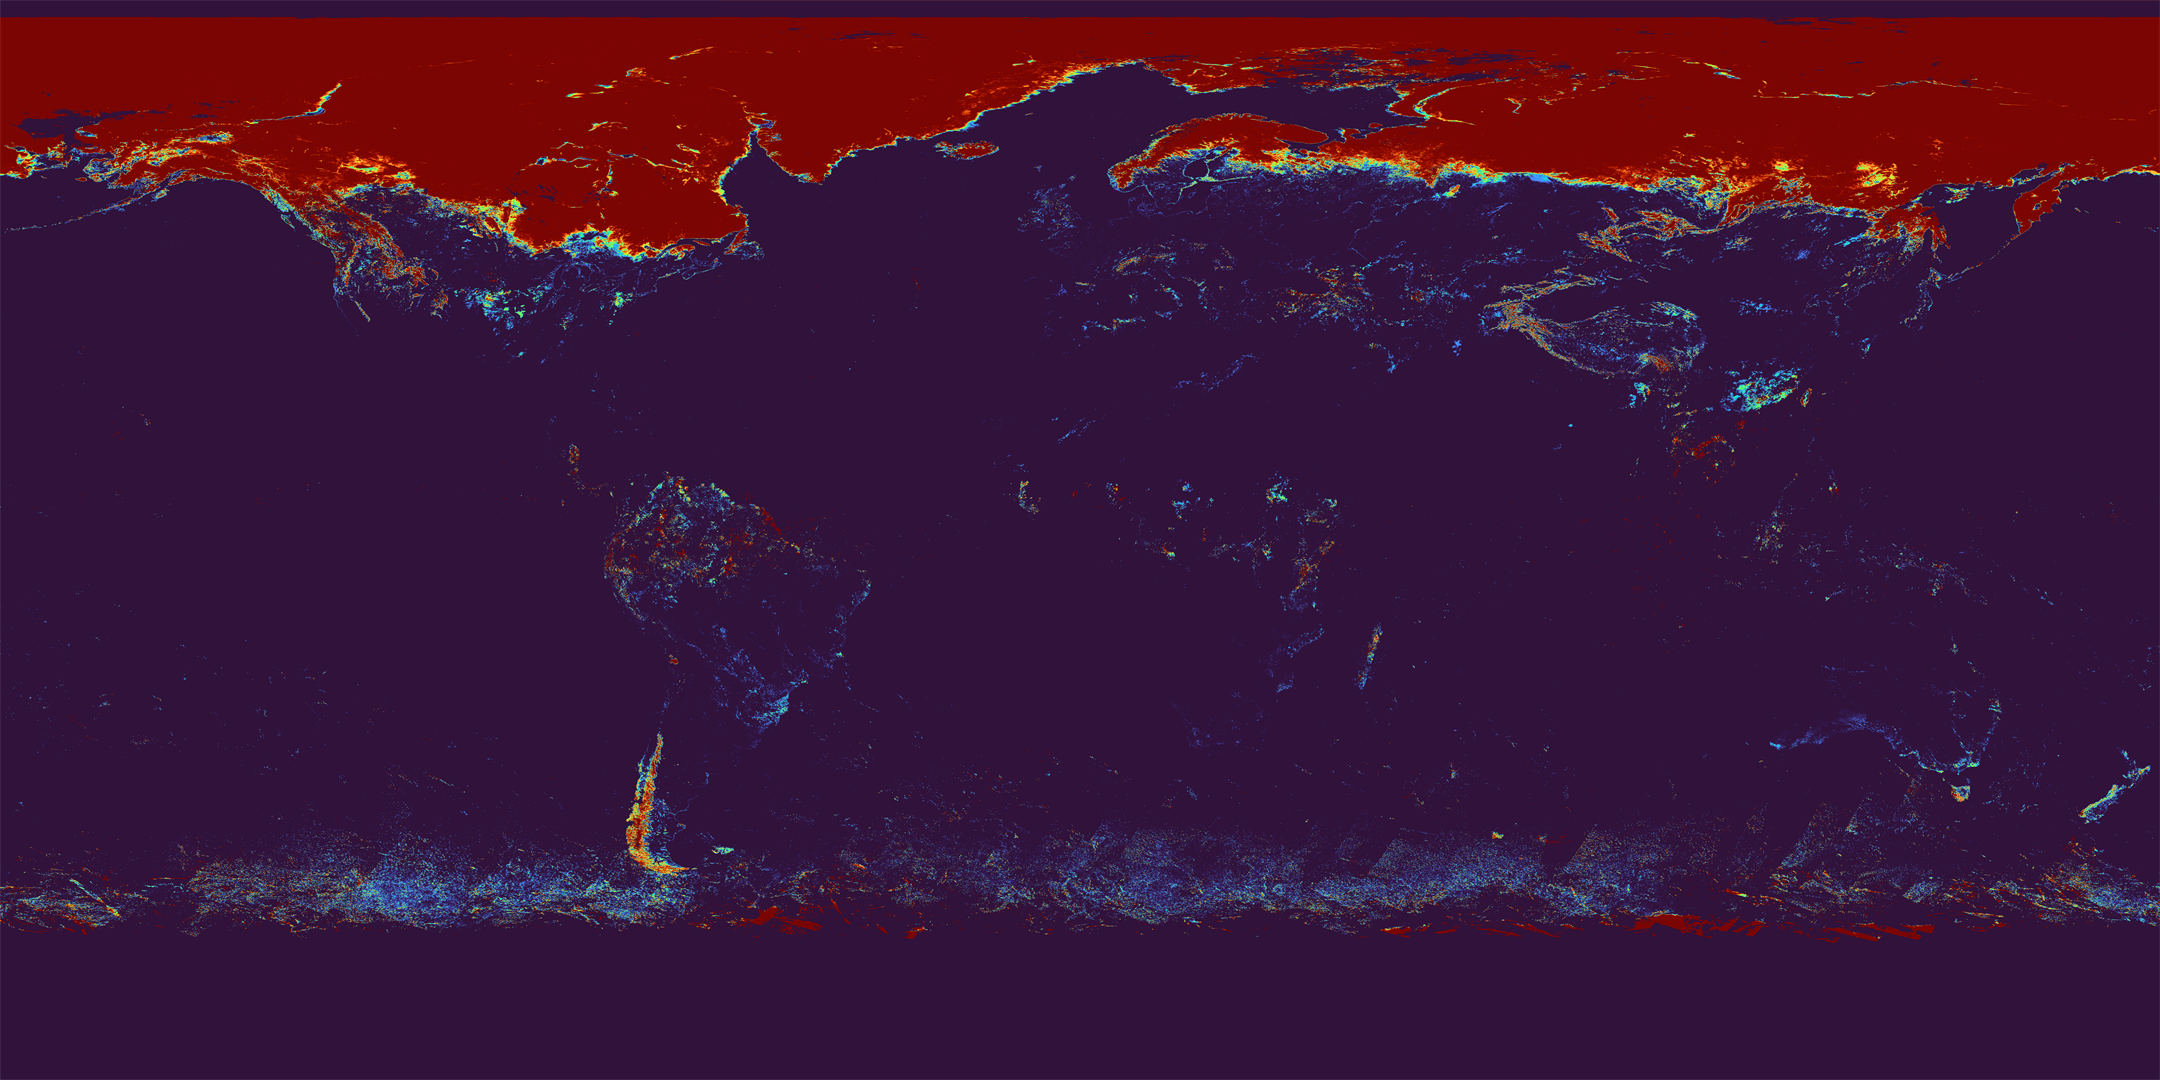
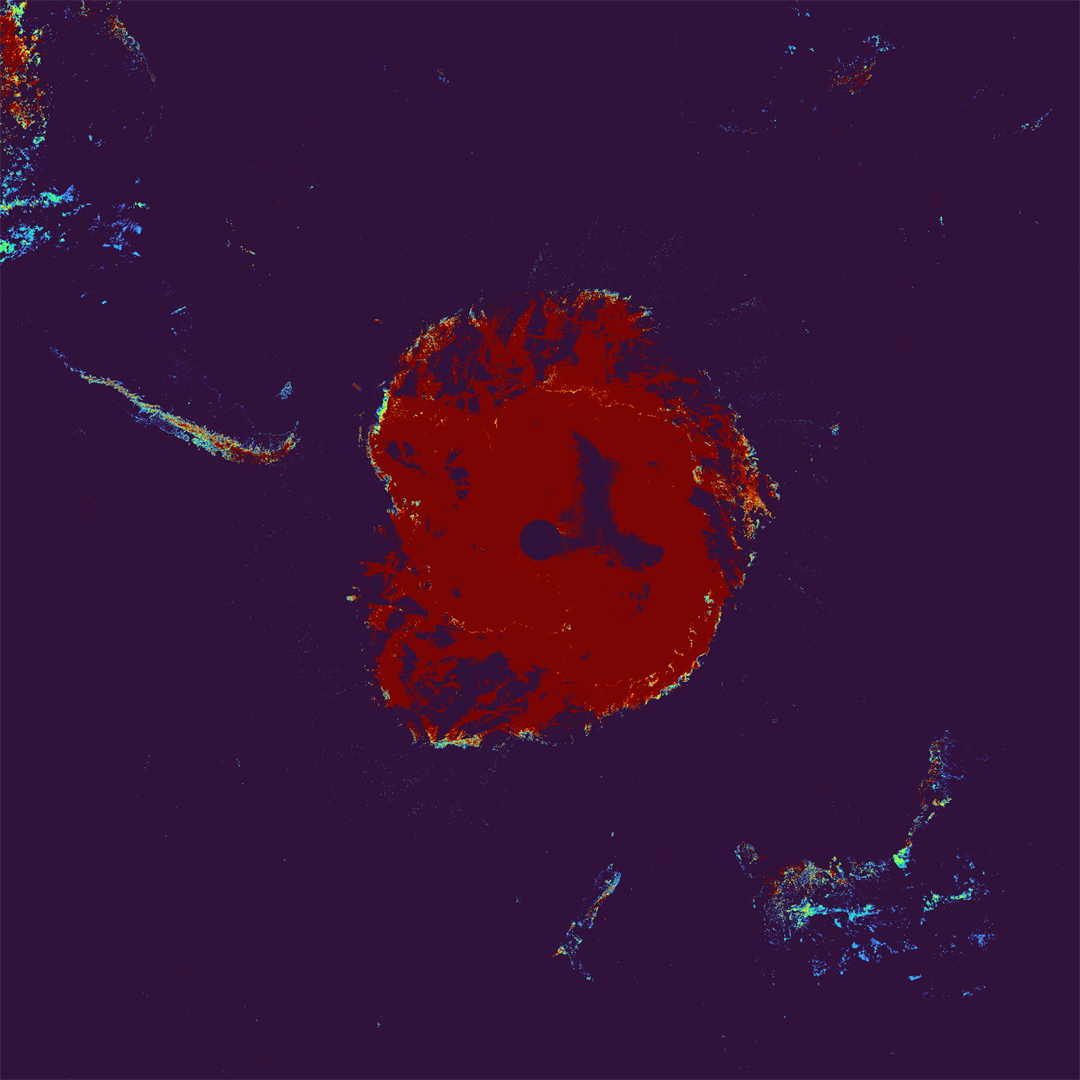
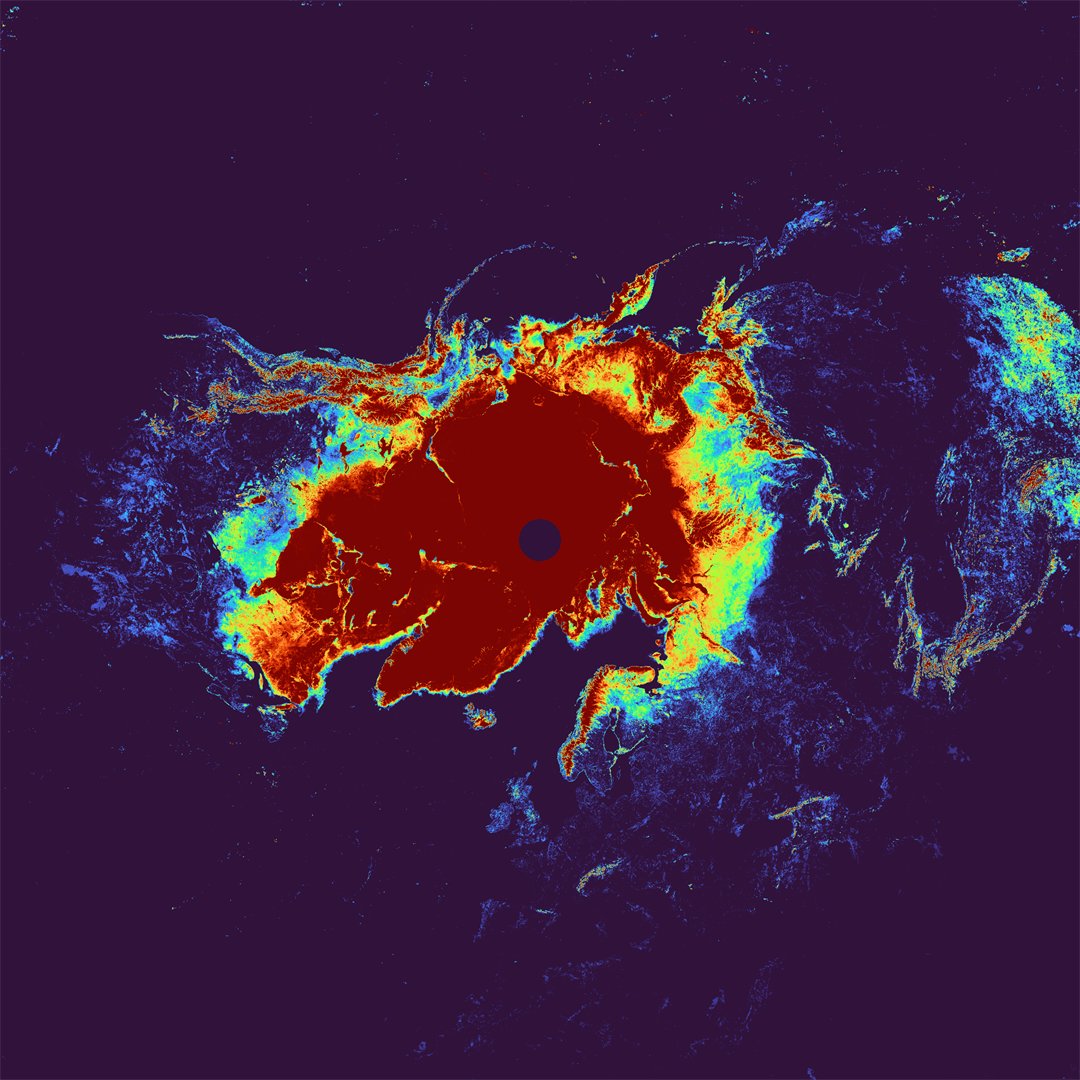
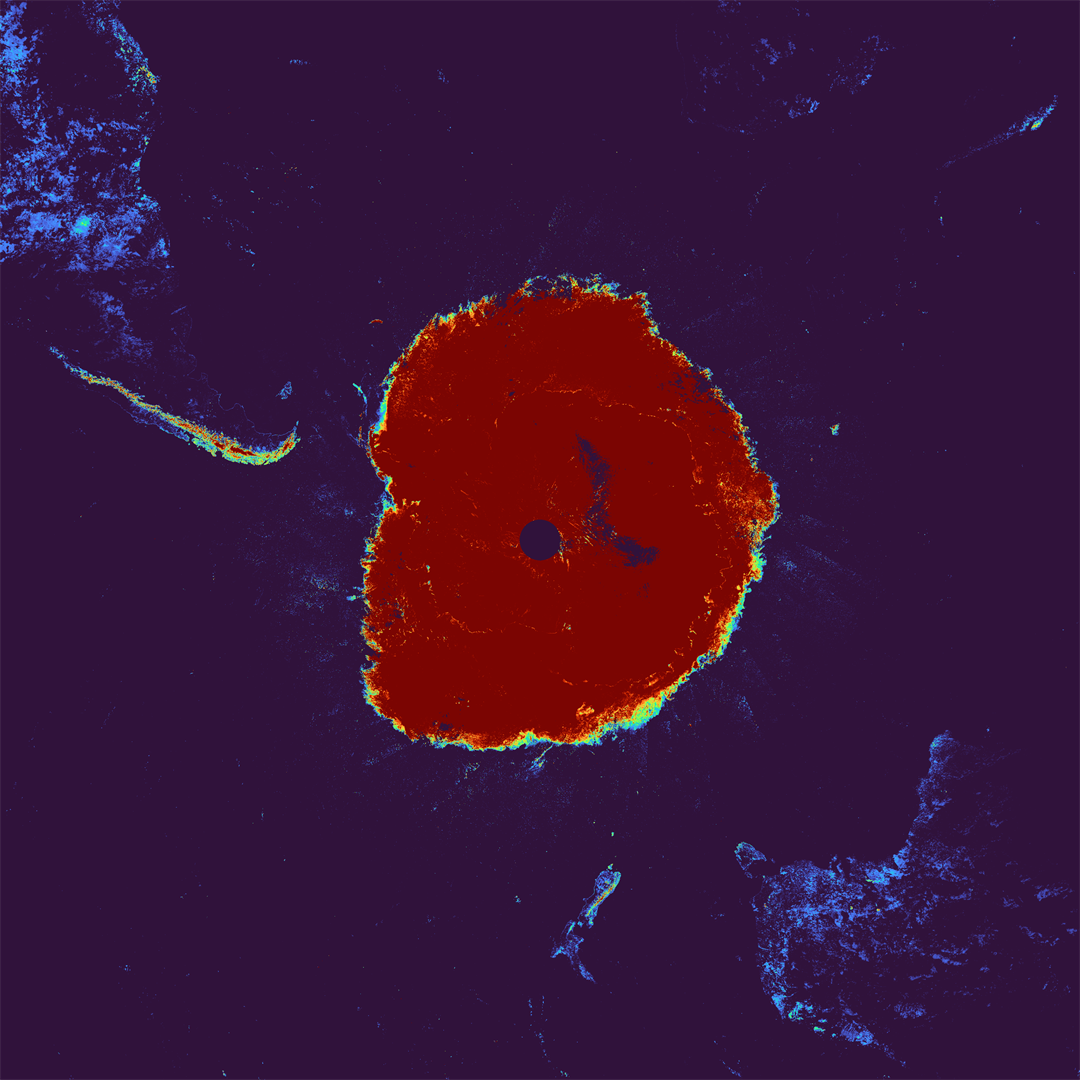
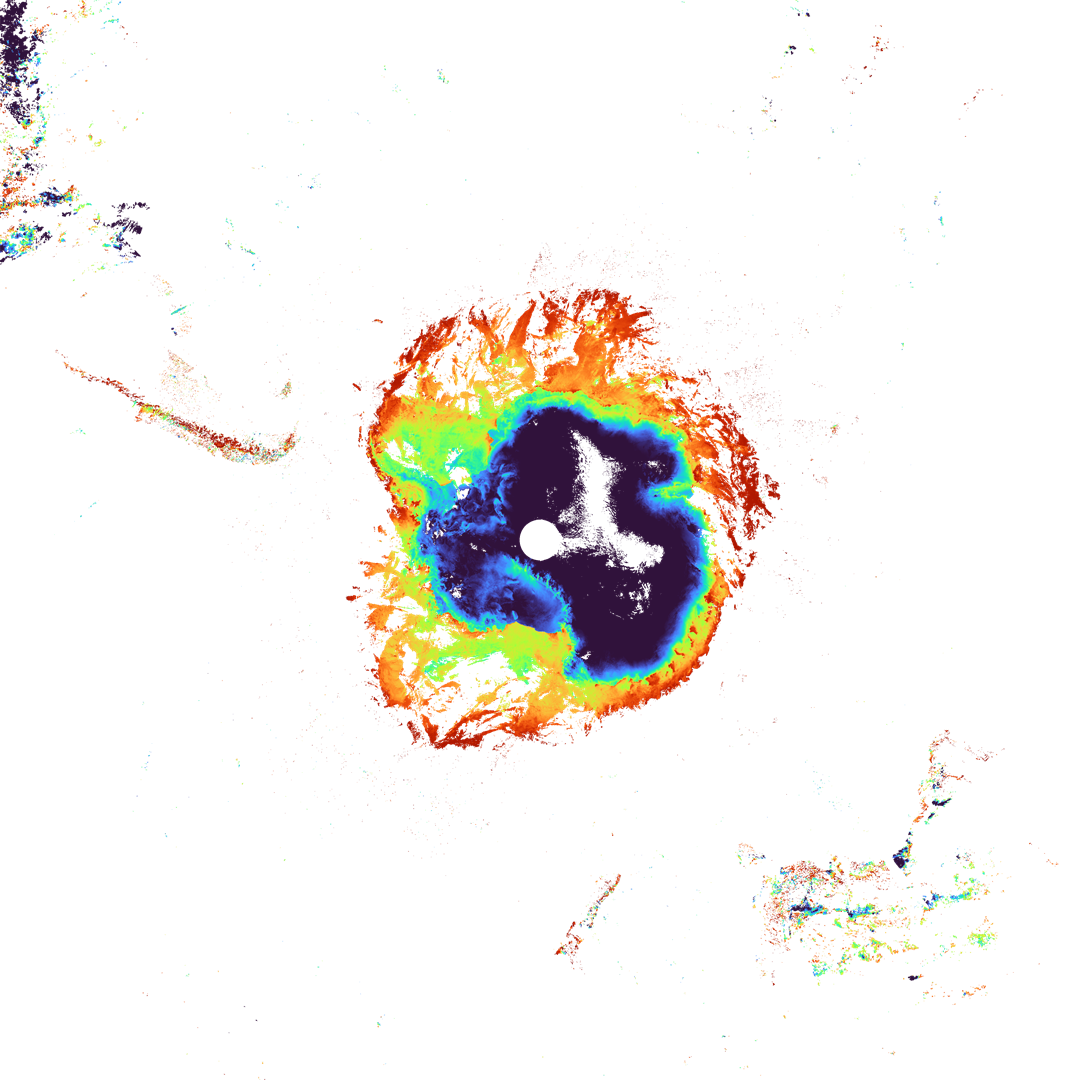
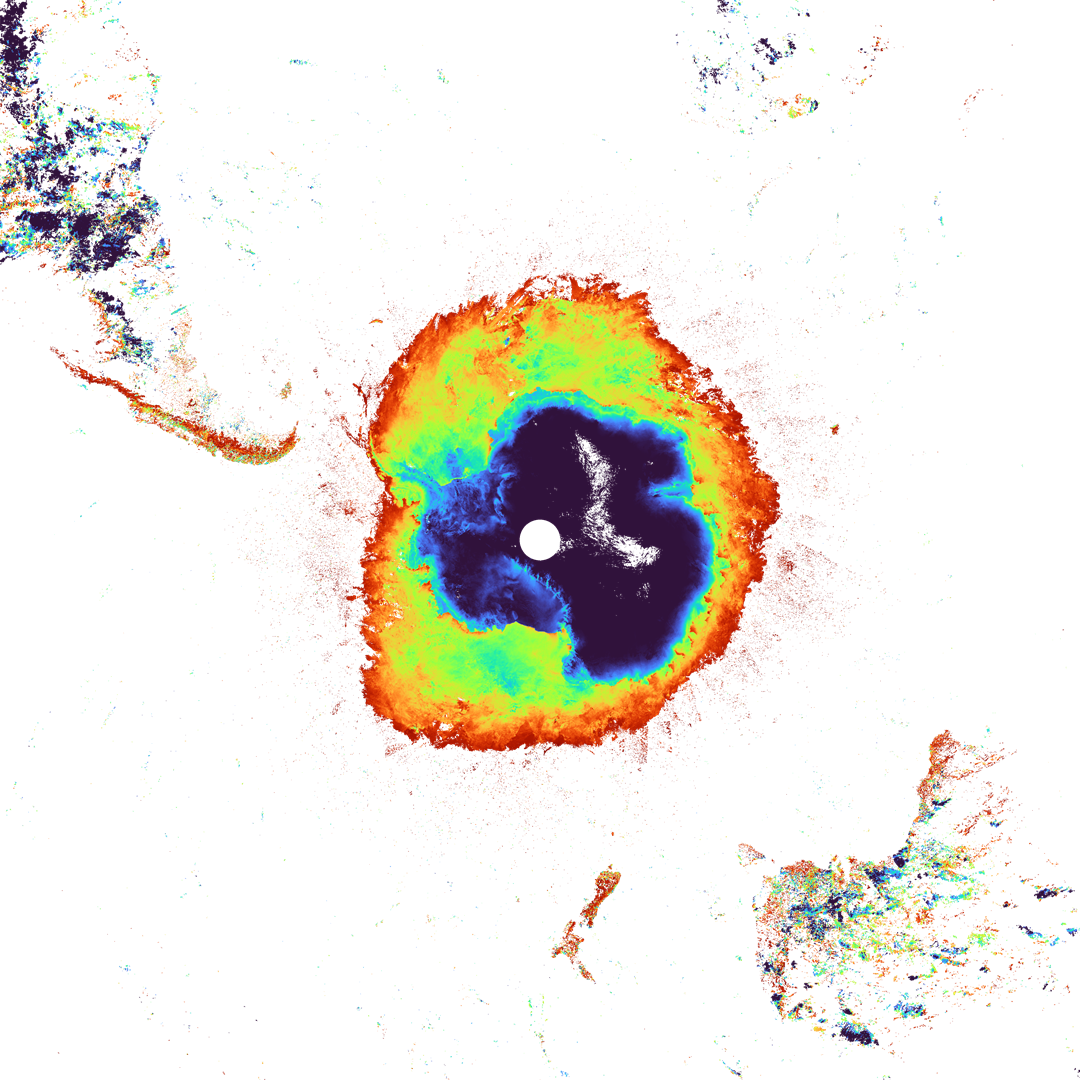
Level-3
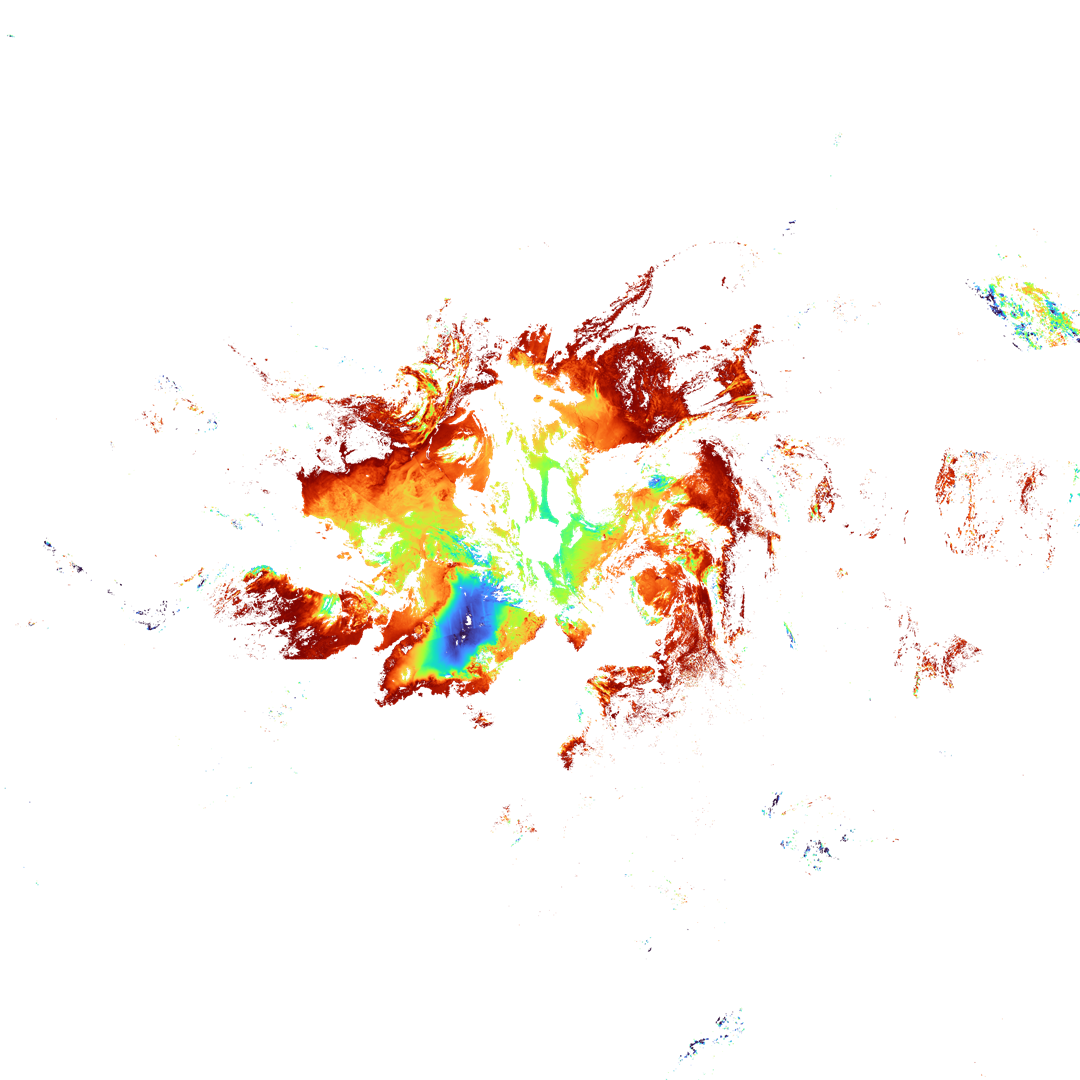
(daily statistics)
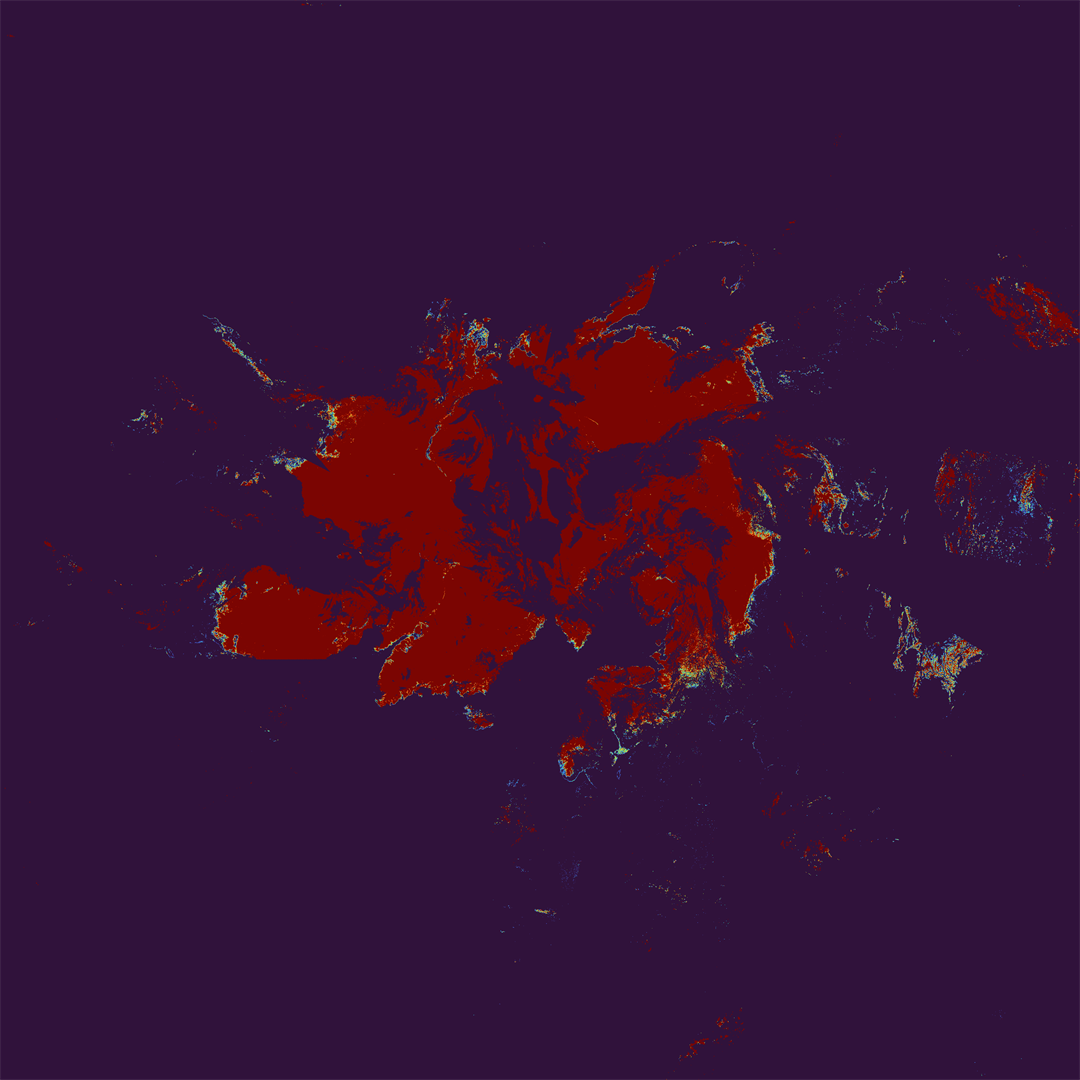
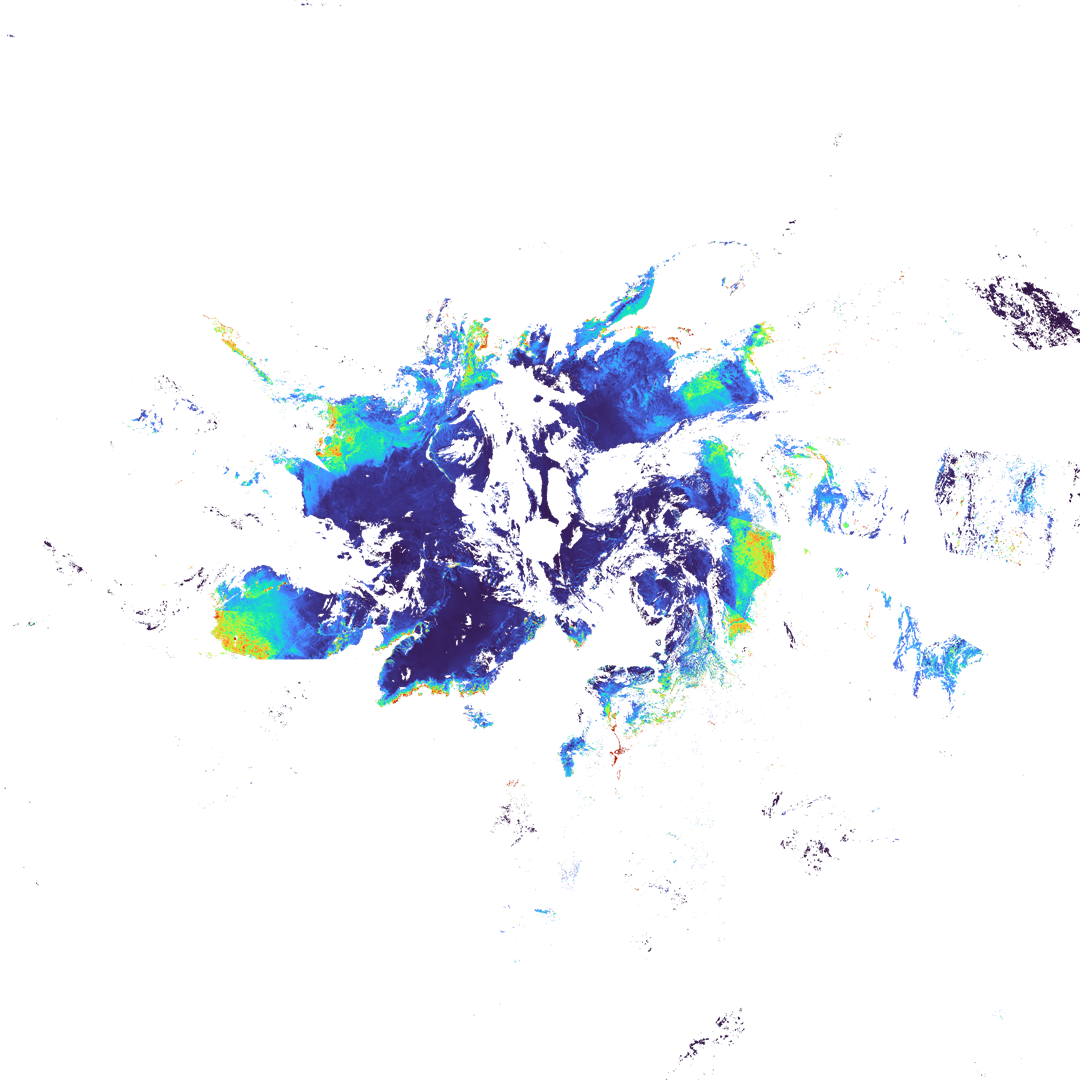
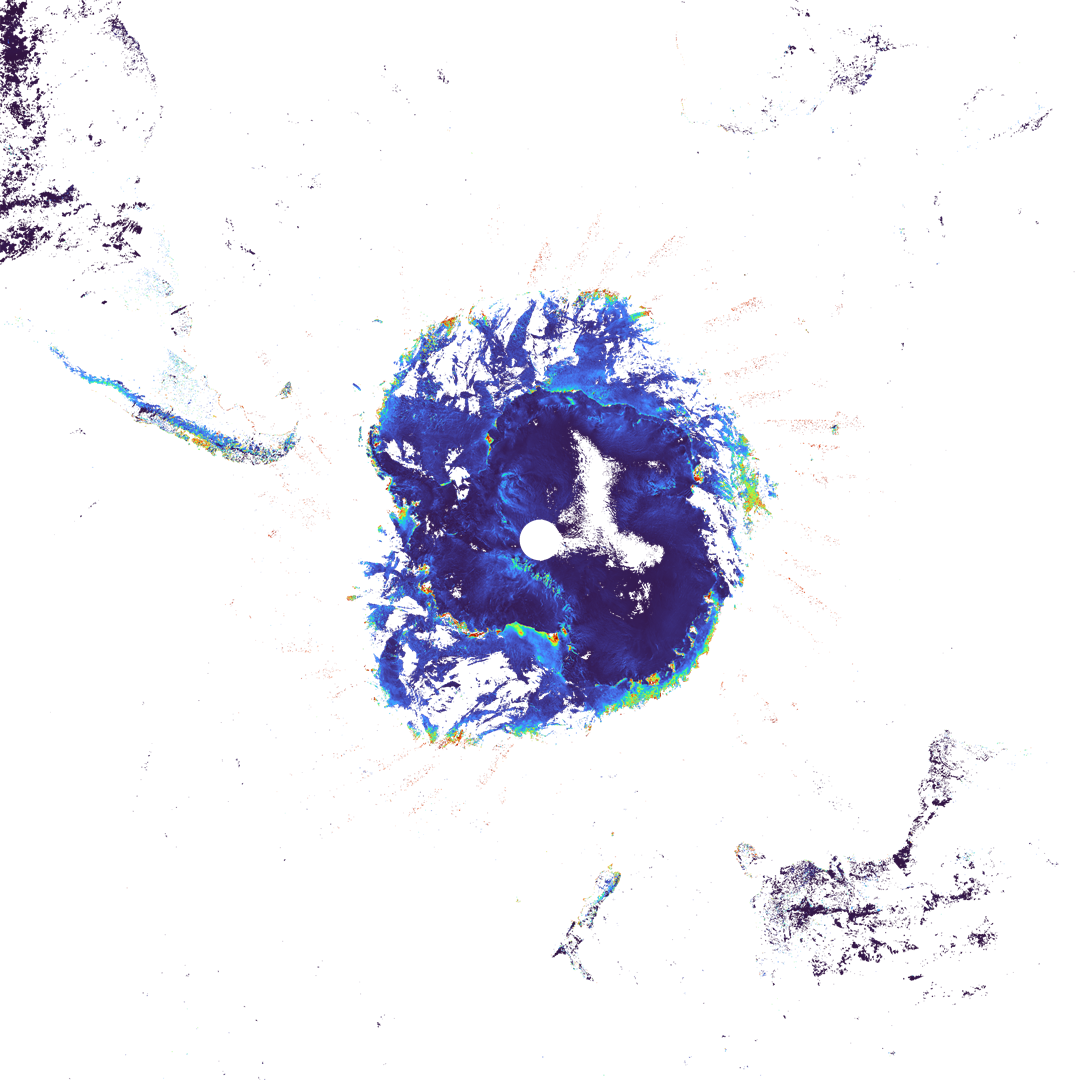
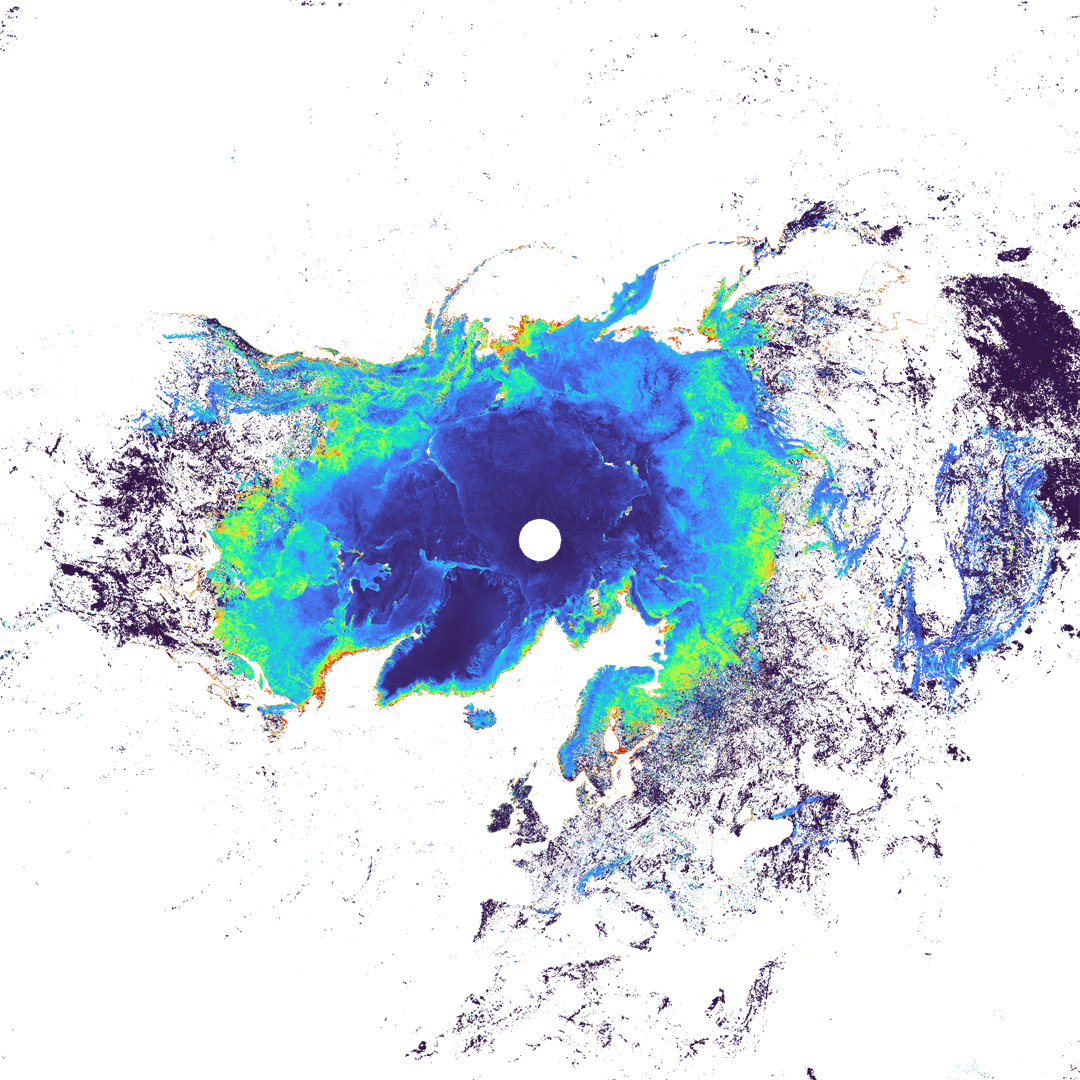
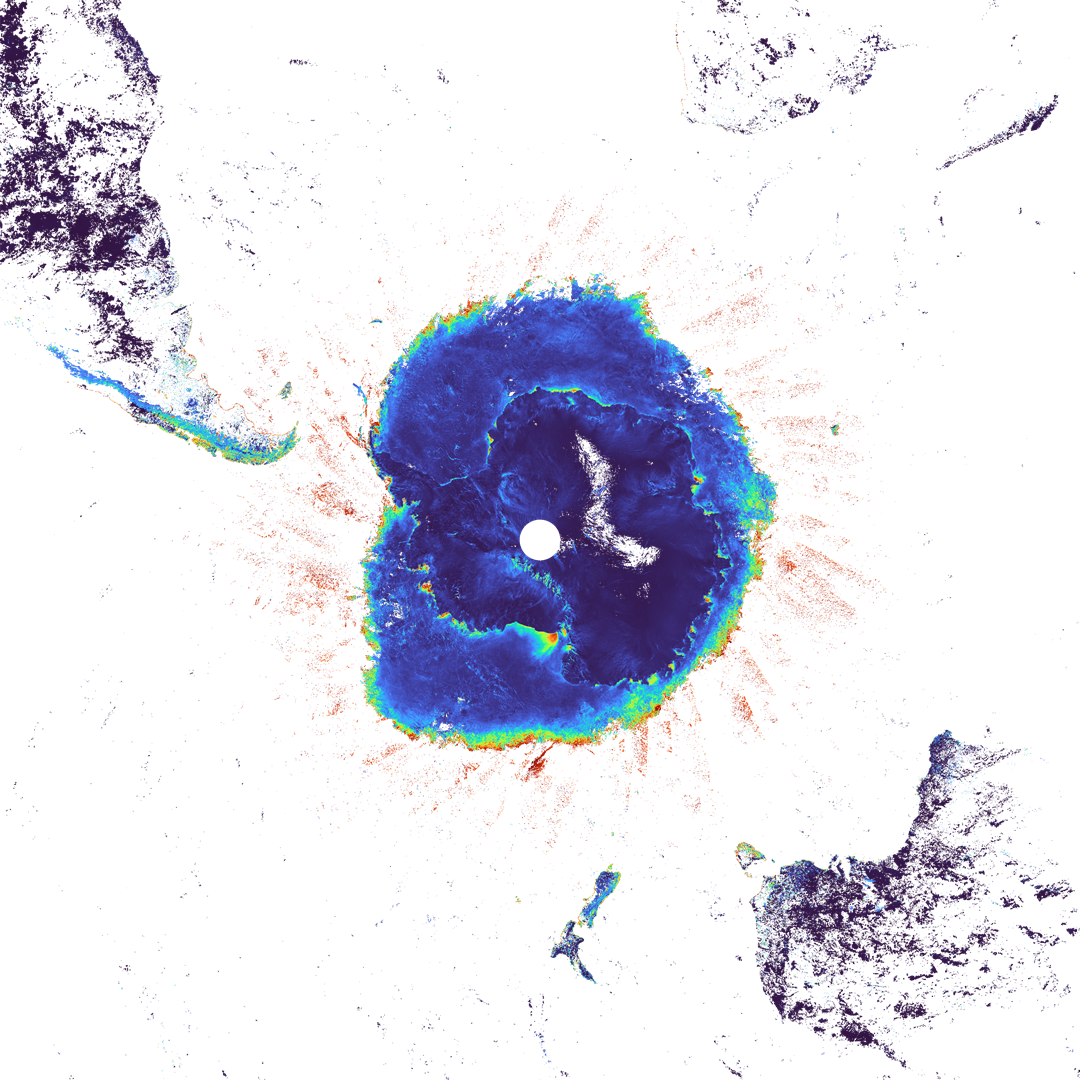
(Left: Arctic Right: Antarctic)
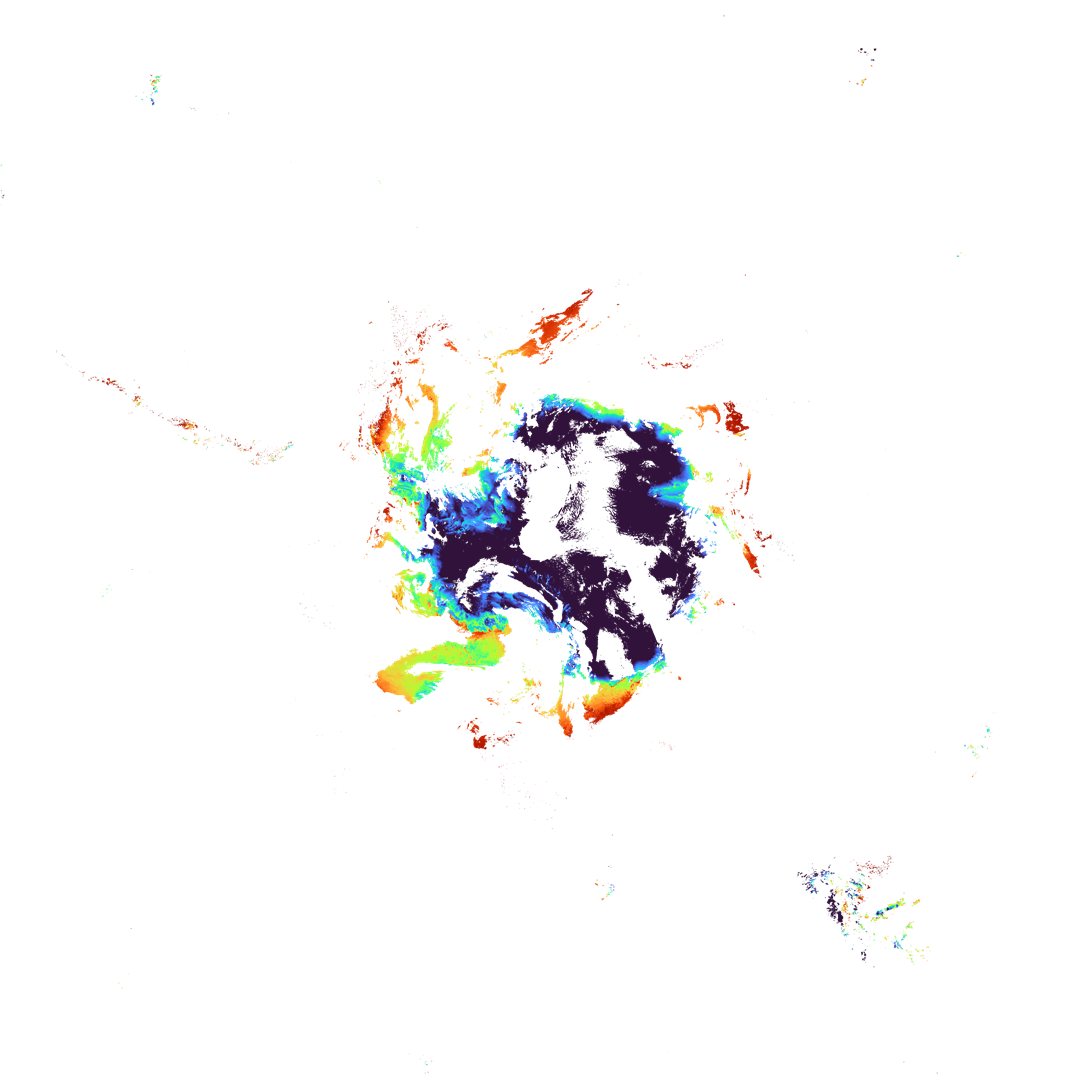
Level-3
(8-day statistics)

(Left: Arctic Right: Antarctic)
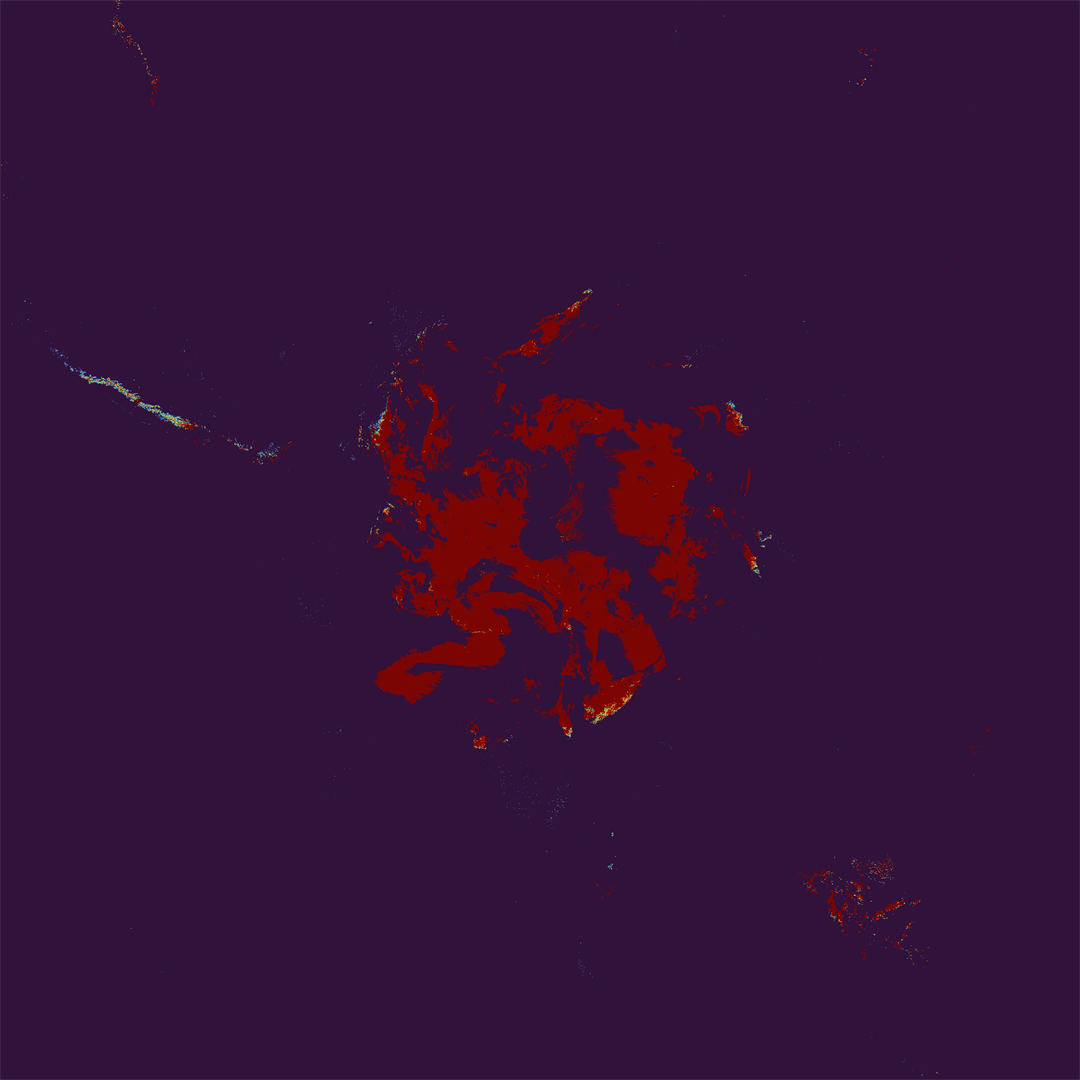
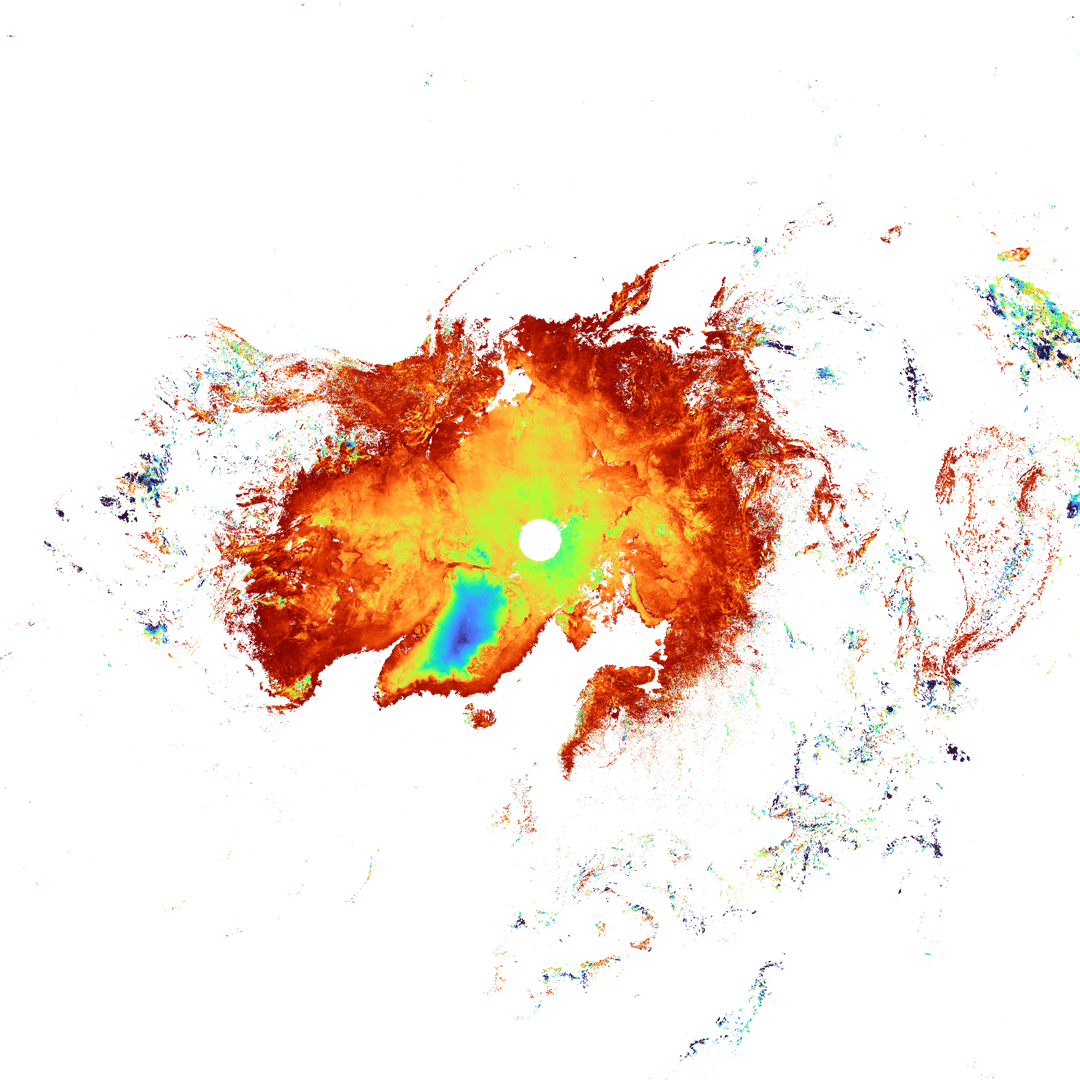
Level-3
(1-month statistics)
(Left: Arctic Right: Antarctic)
OKID (Okhotsk sea-ice distribution)
Level-2 products are provided as scene-by-scene HDF files.
G-Portal: HDF5
G-Portal Processing Request: GeoTIFF
JASMES: NetCDF4
Physical quantity
OKID (Okhotsk sea-ice distribution)
The extent of sea ice in the Okhotsk Sea
Resolution
Level-2: 250m, 1km (Based on observation)
Level-2
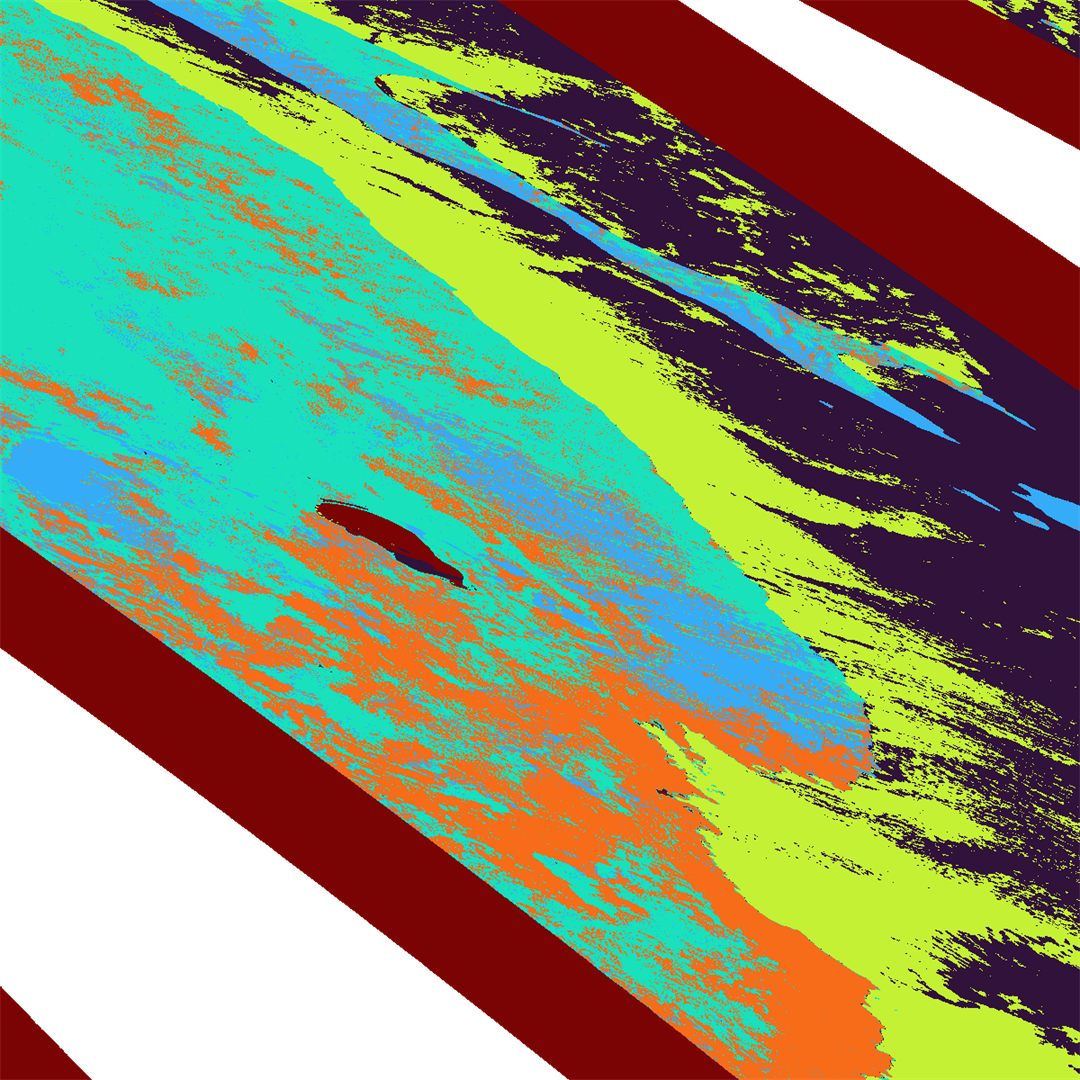
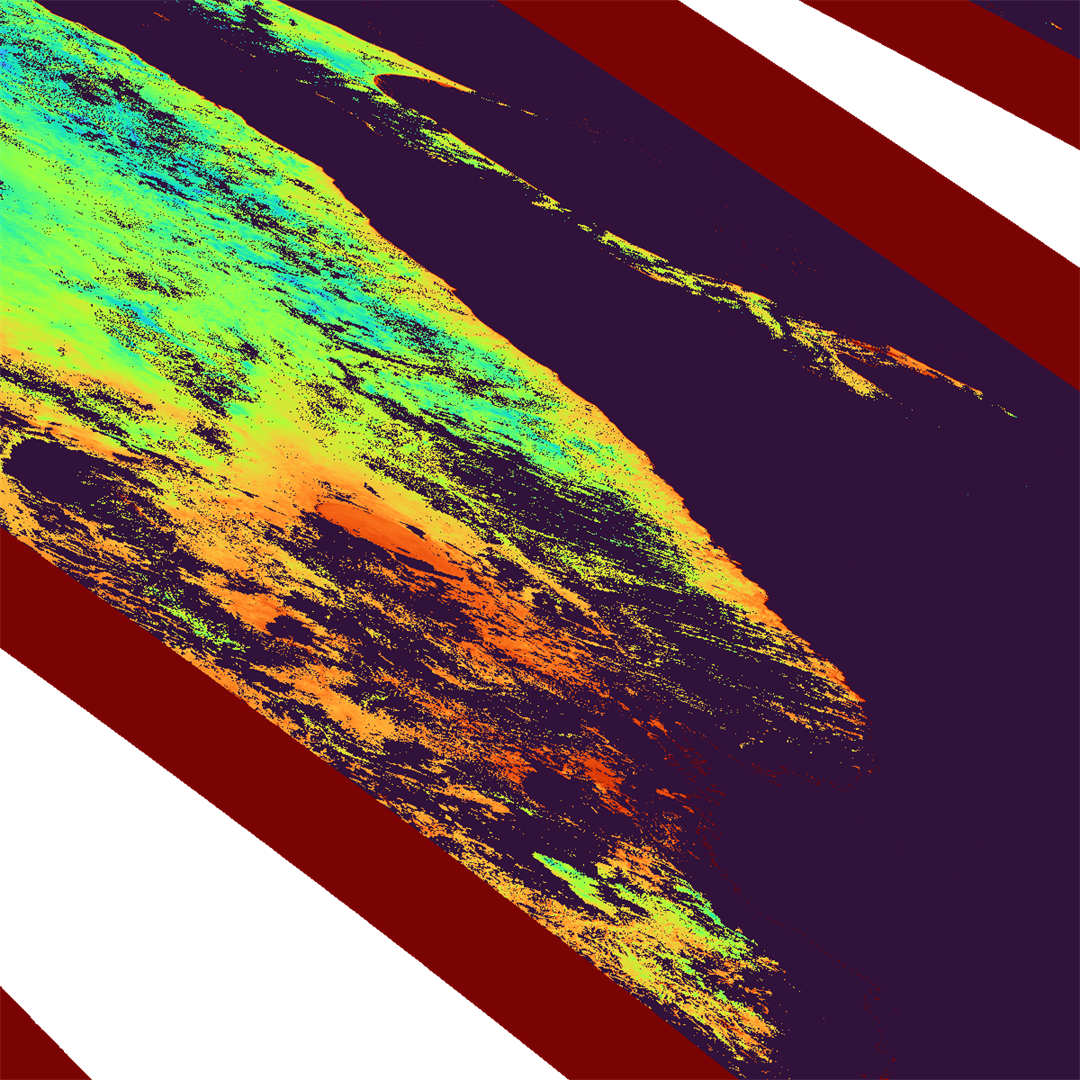
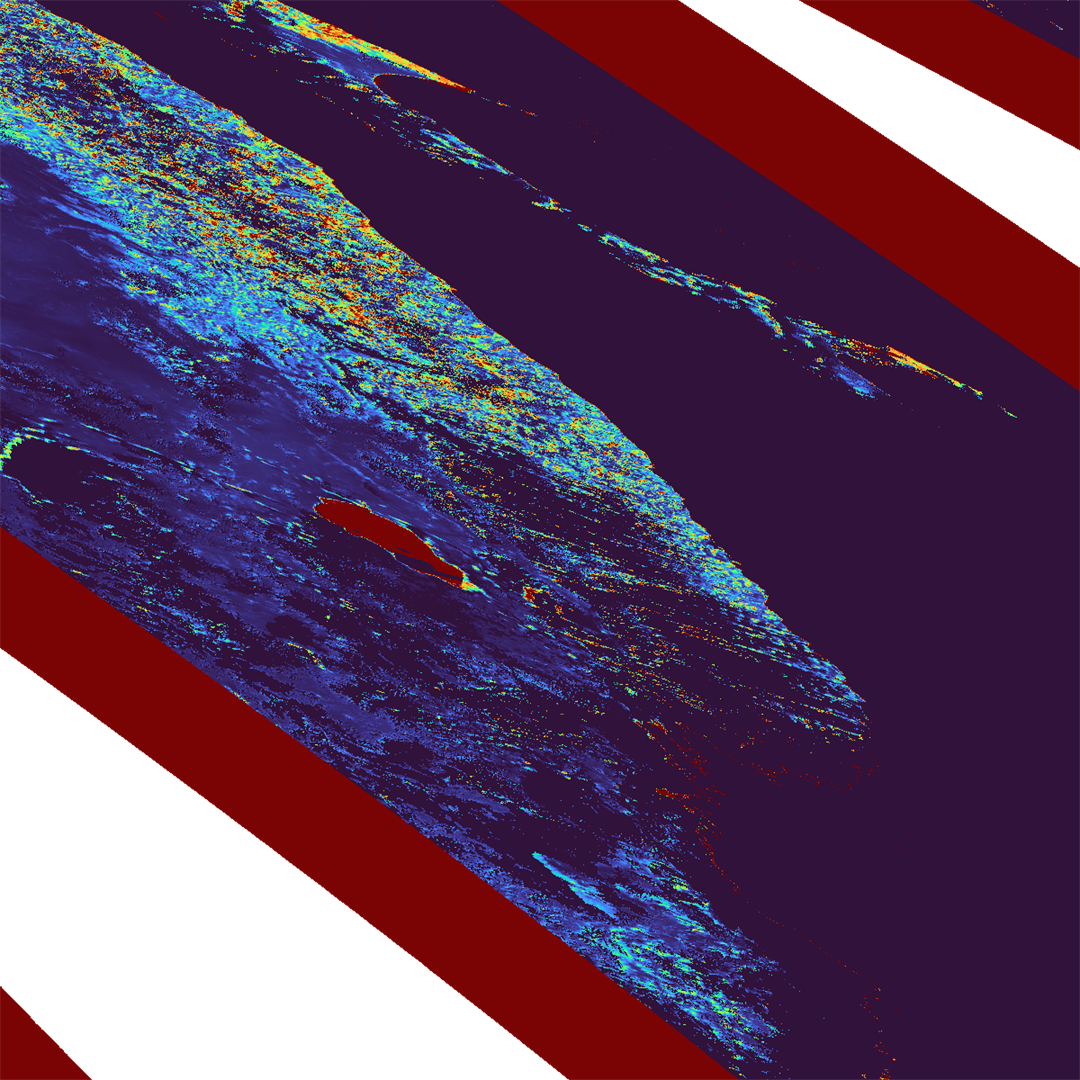
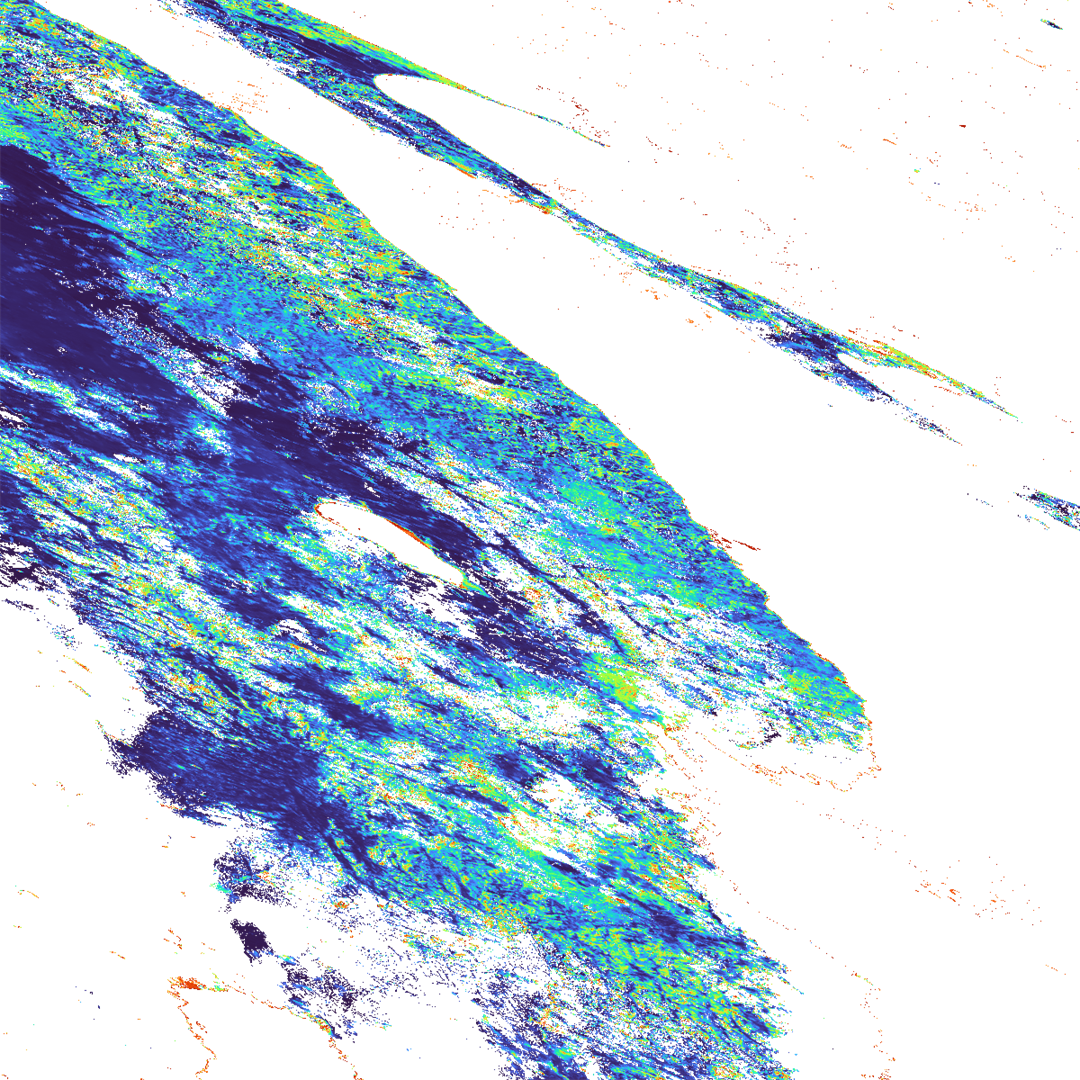
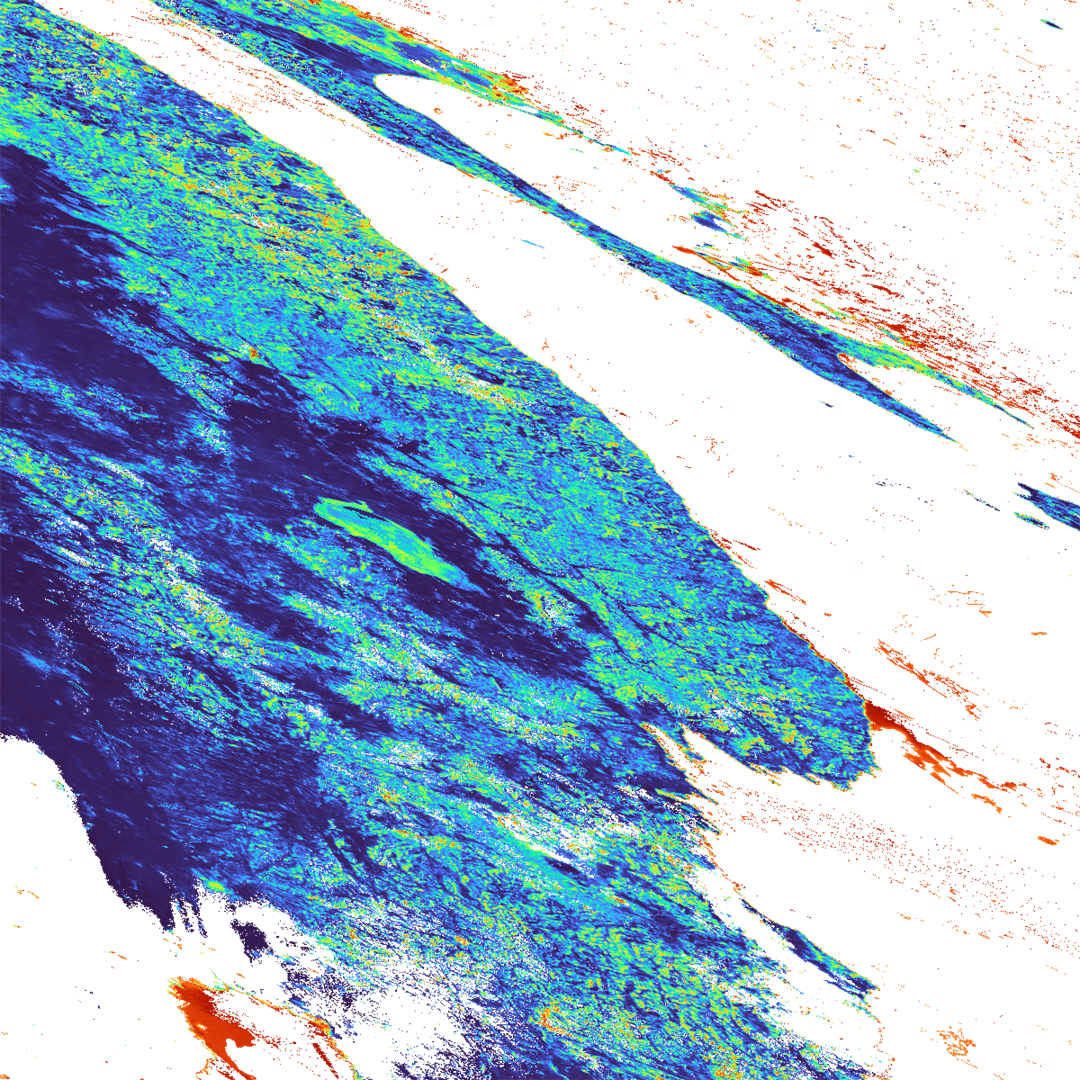
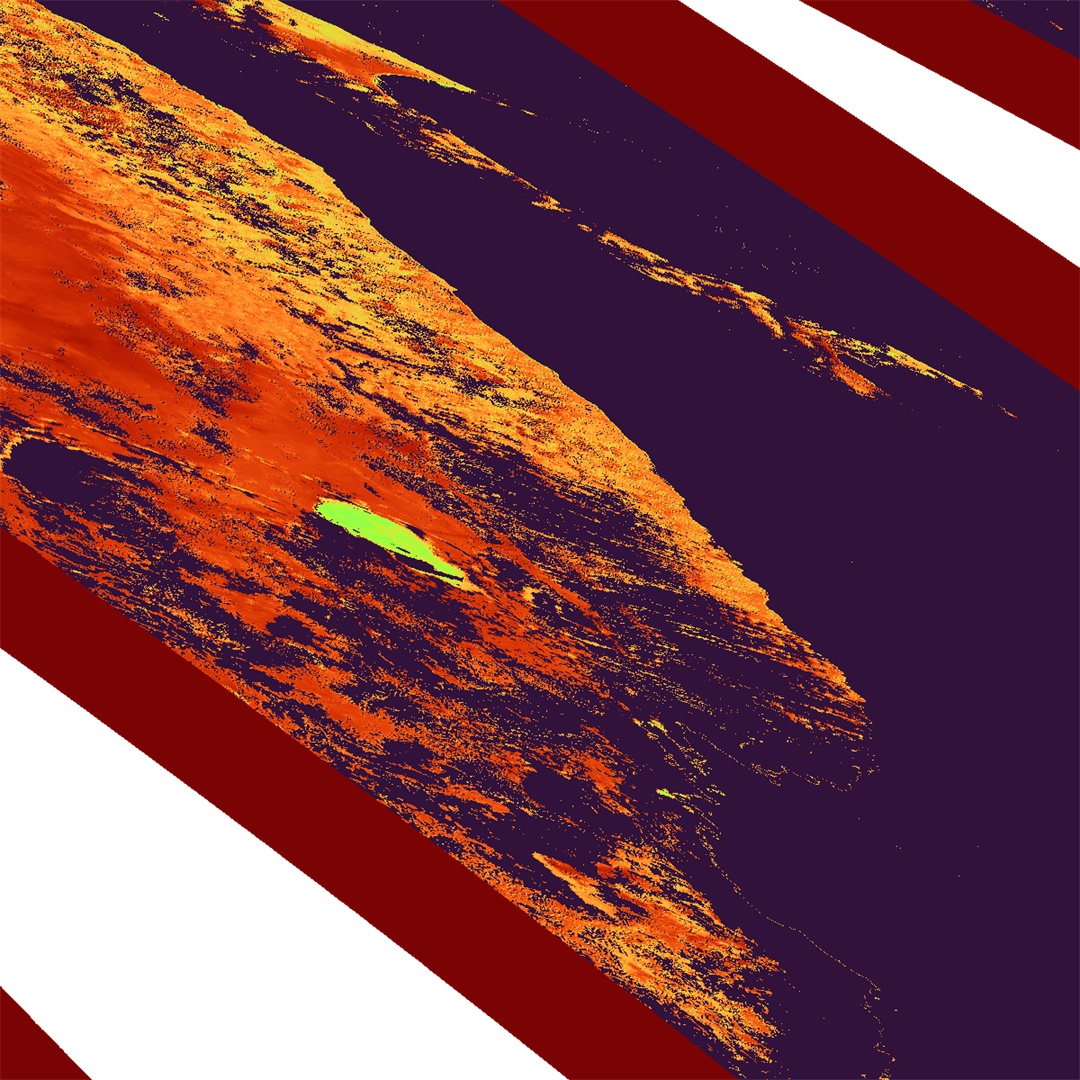
SIPR (Snow and Ice Physical Properties) [SIST/ SGSL/ SALB]
Level-2 products are provided as a single HDF5 file including SIST (snow and ice surface temperature), SGSL (snow grain size of the shallow layer), and SALB (snow and ice blue-sky albedo) by tile units.
Level-2 statistical products are provided as separate geophysical products, by tile units.
(For more information on tile products, see FAQ https://shikisai.jaxa.jp/faq/faq0080.html.)
Level-3 products are provided as individual physical quantity products.
G-Portal: HDF5
G-Portal Processing Request: GeoTIFF(Individual files)
JASMES: NetCDF4
Physical quantities
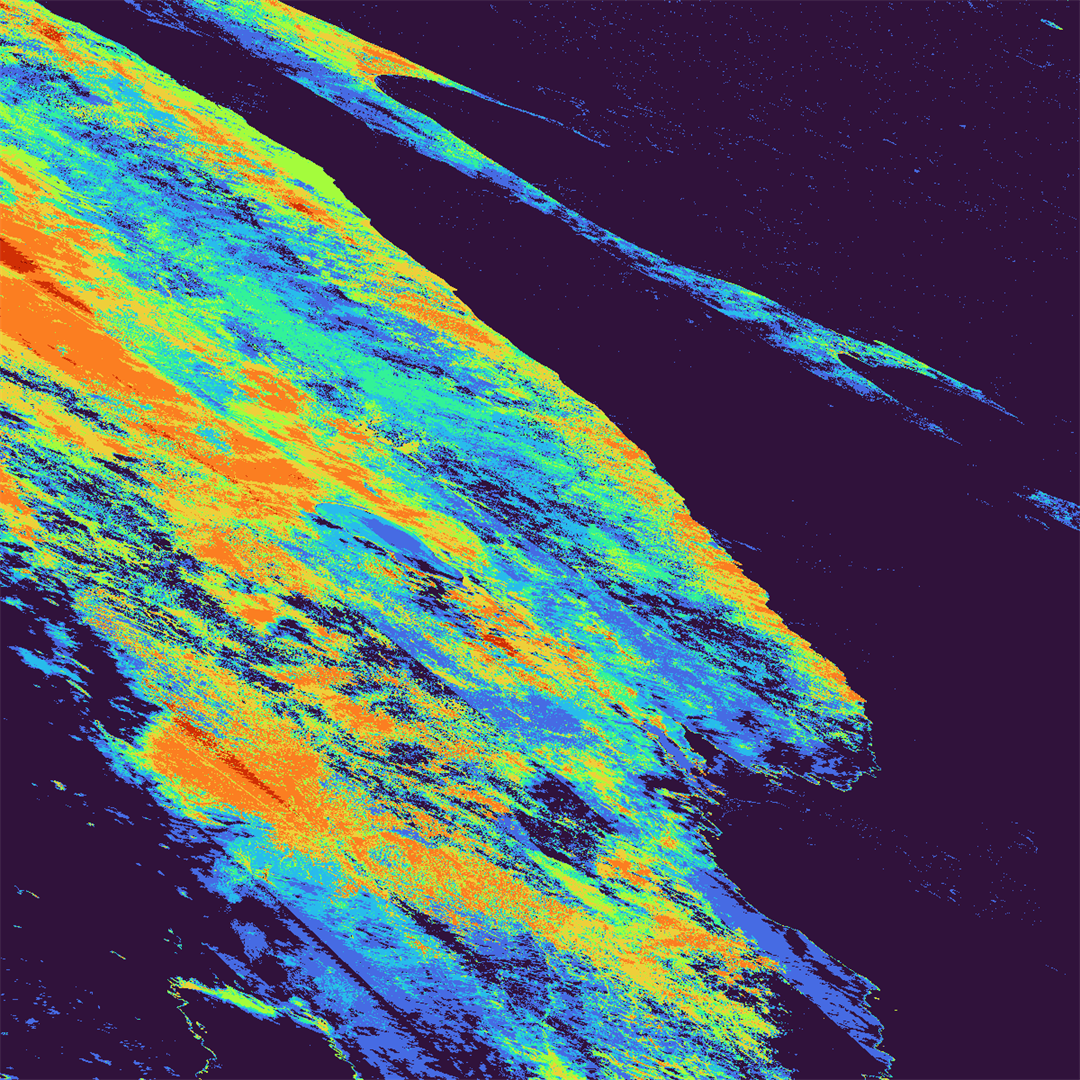
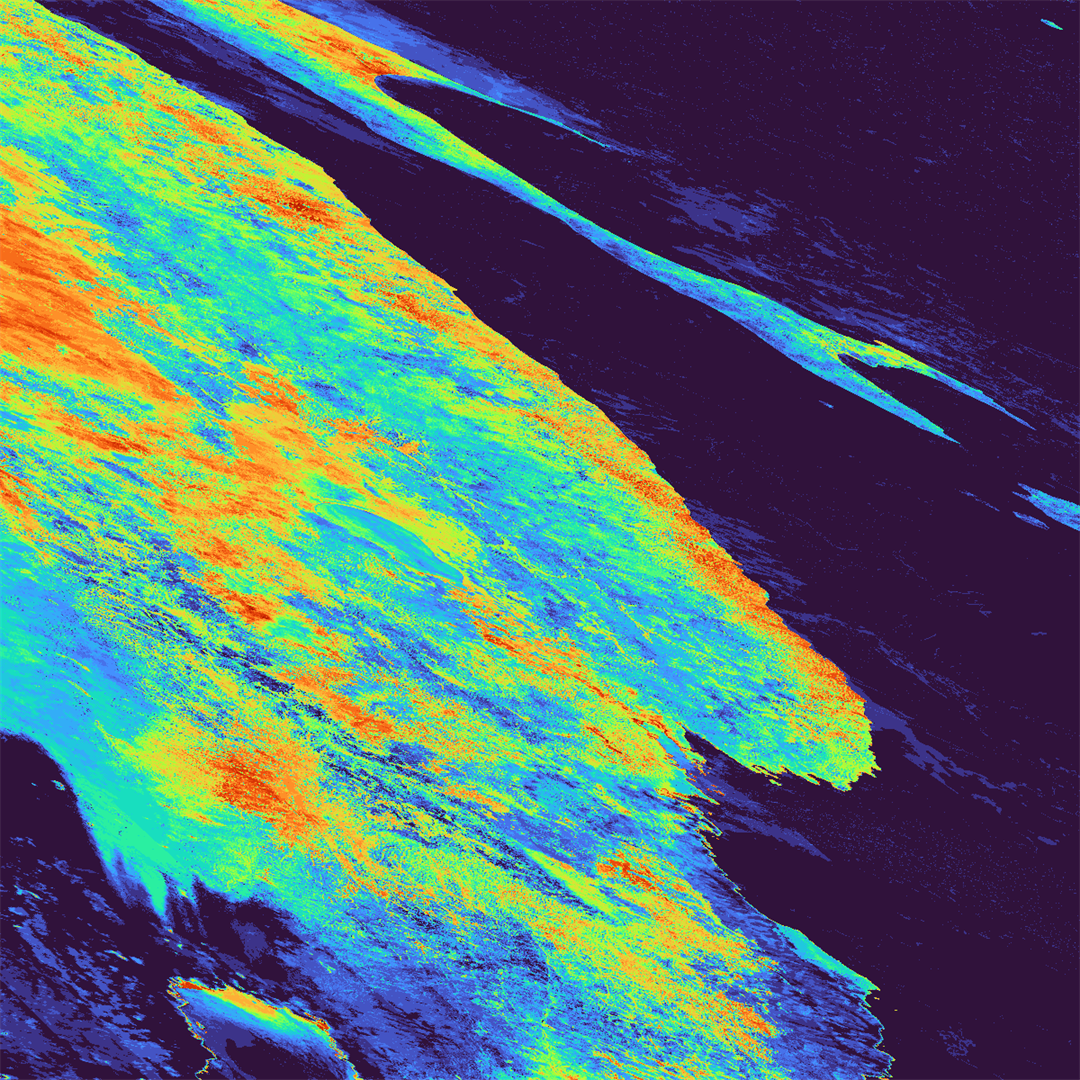
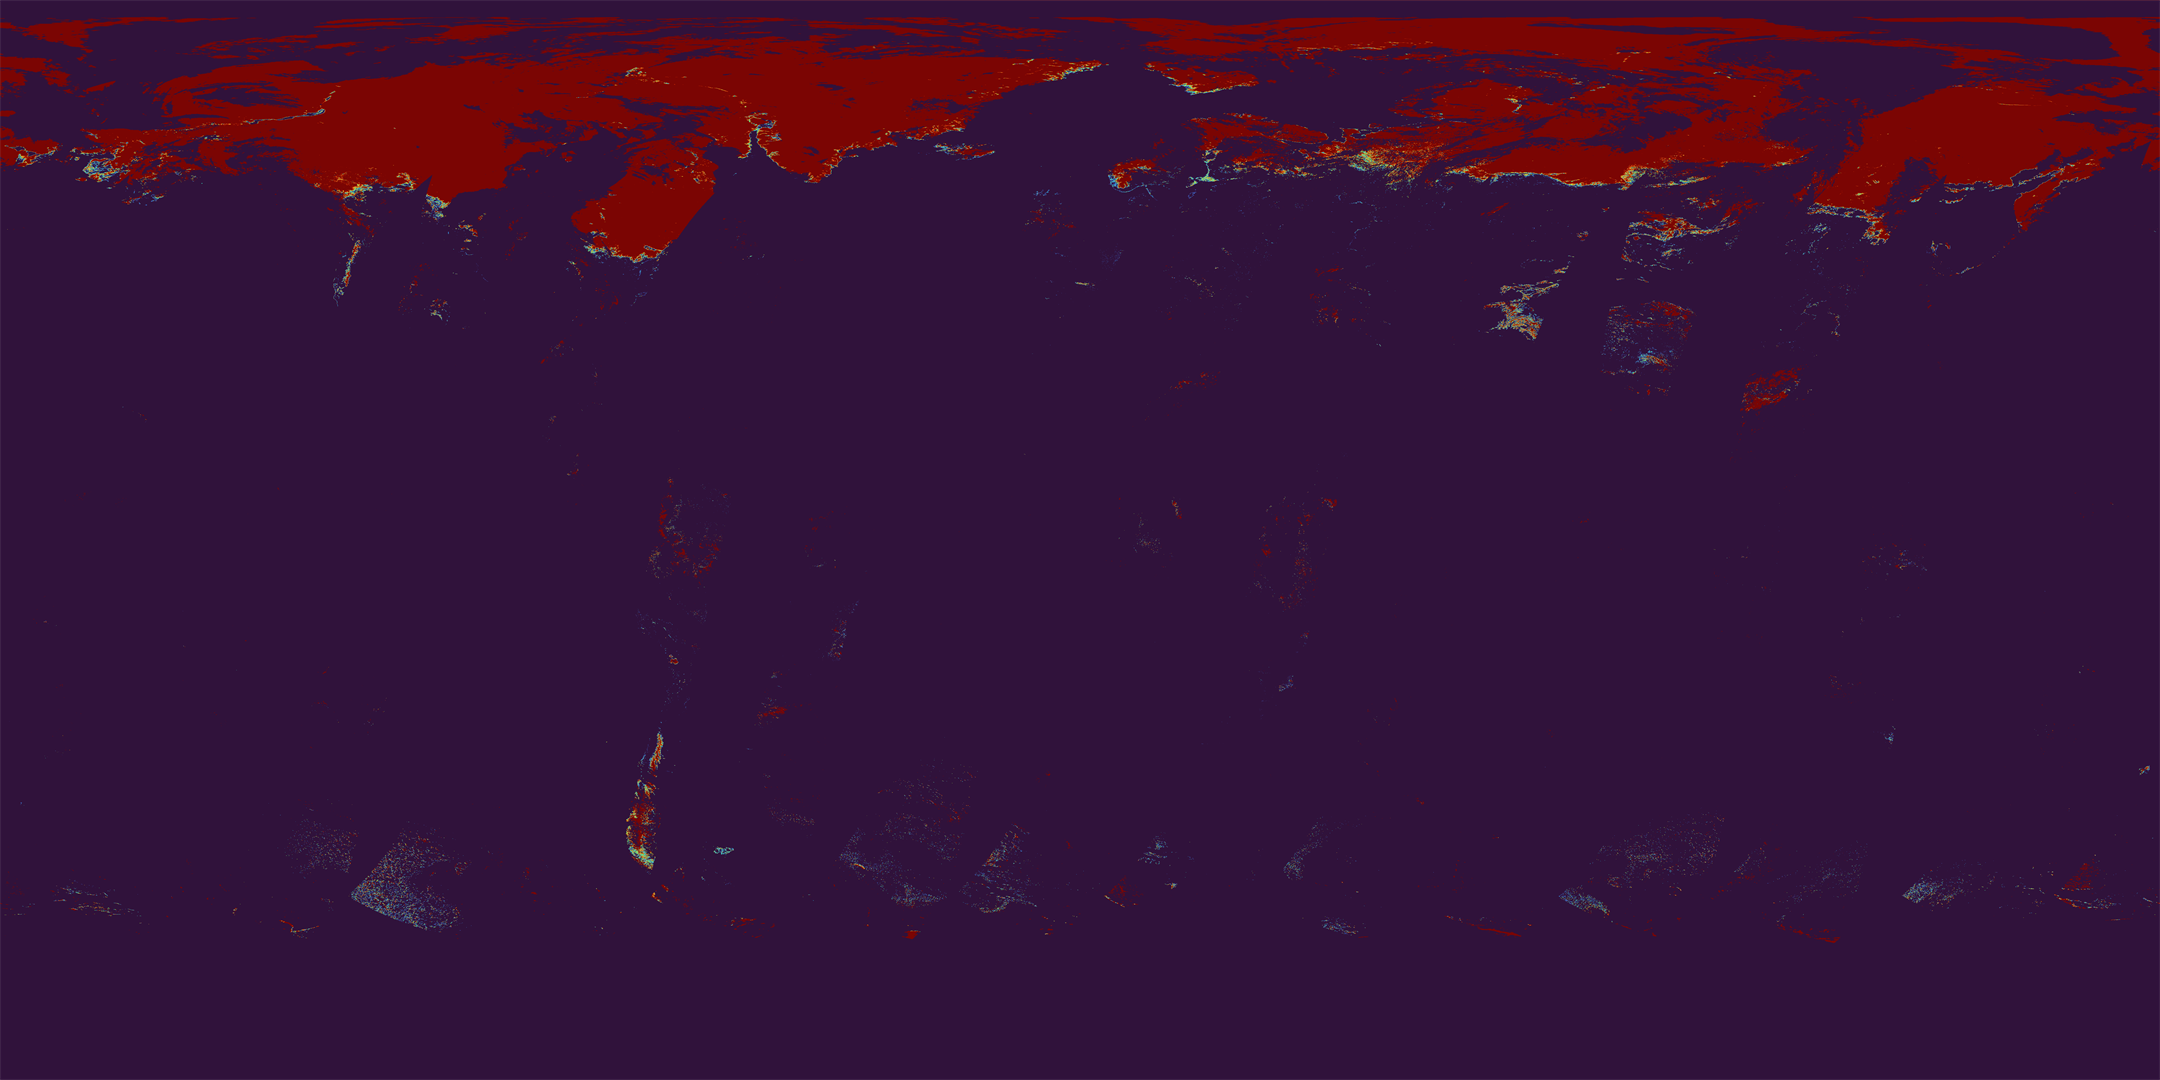
SIST (snow and ice surface temperature)
Temperature of snow and ice surface(Kelvin)
Resolution
Level-2: 250m, 1km
Level-2 statistics: 1km
Level-3: 1/24deg (4.6km)
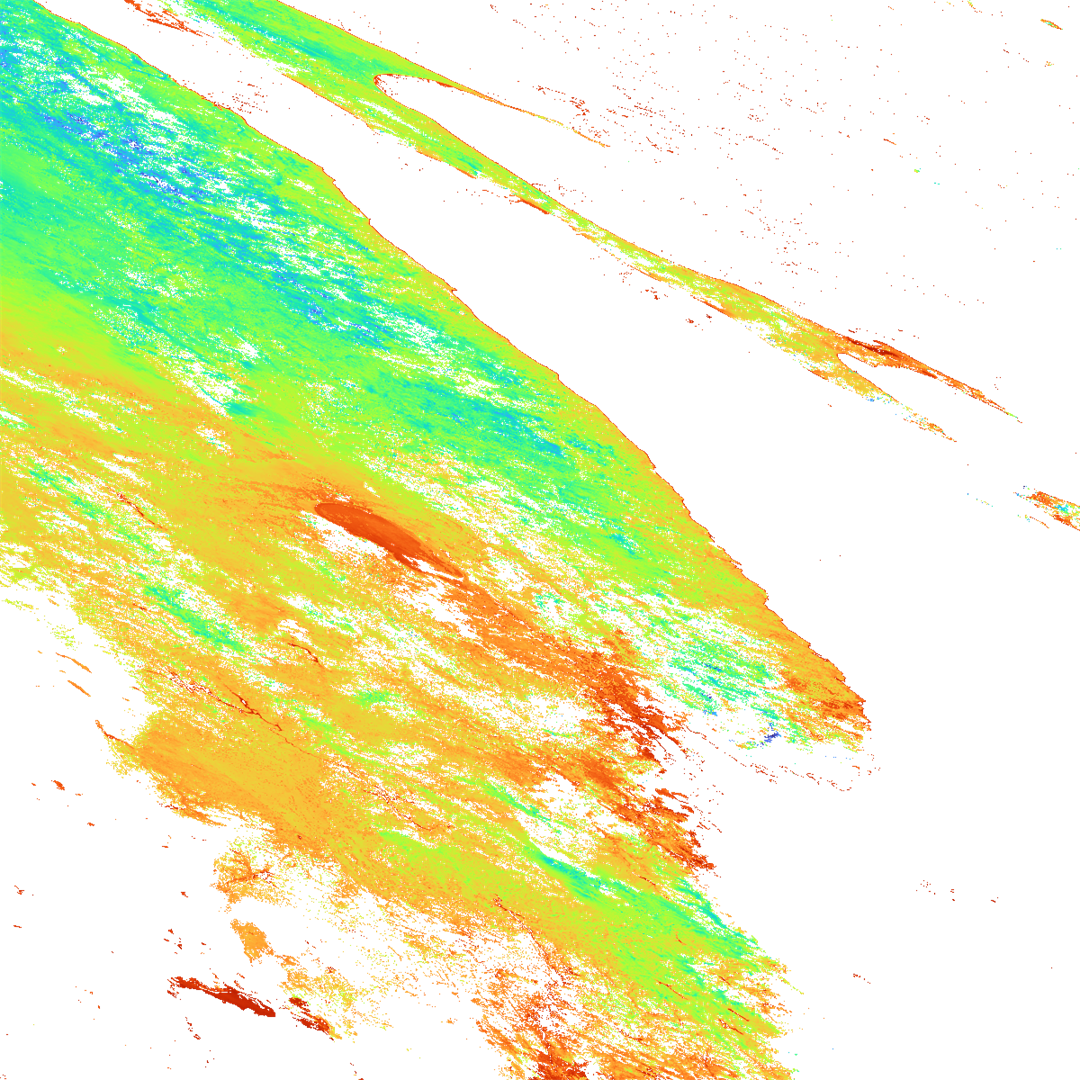
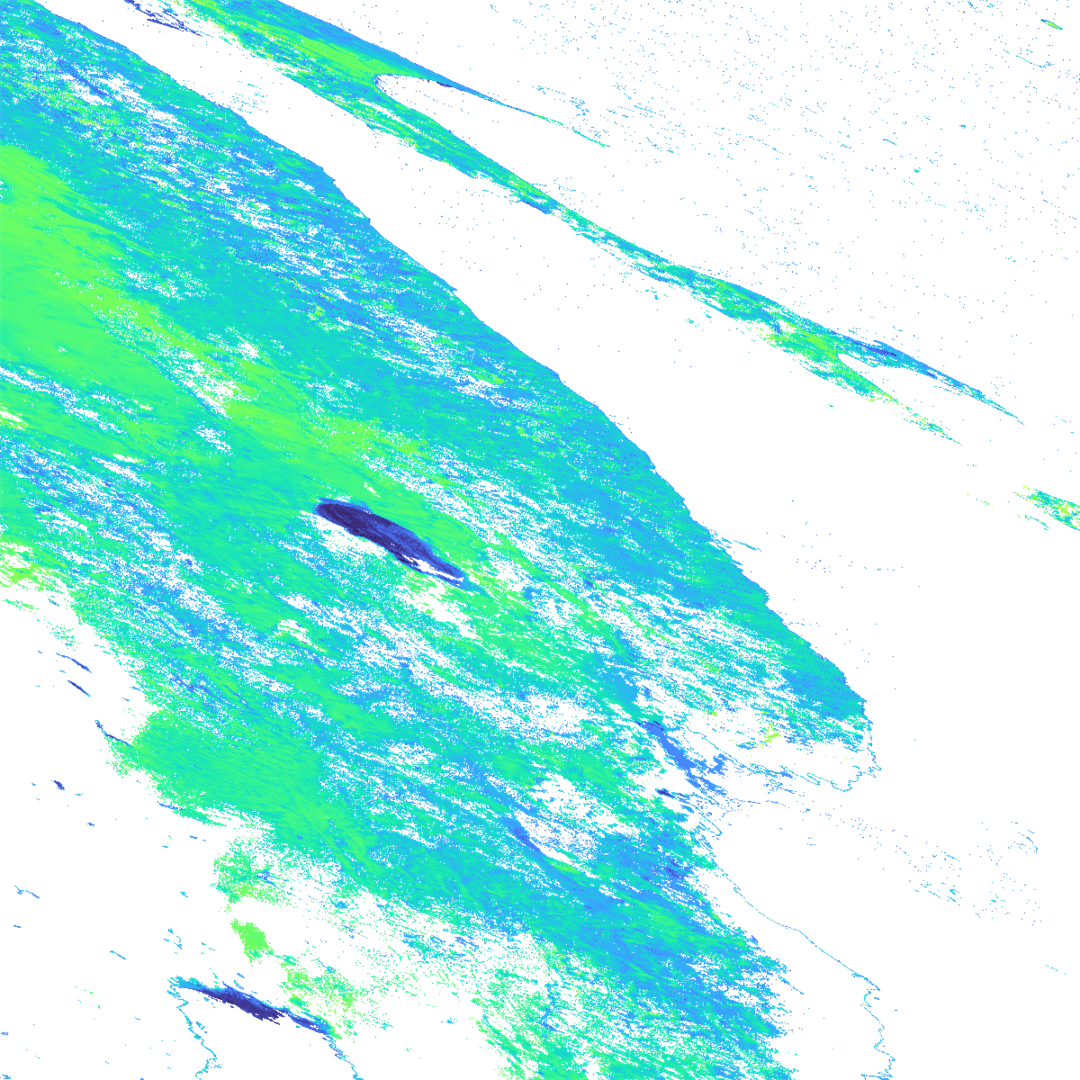
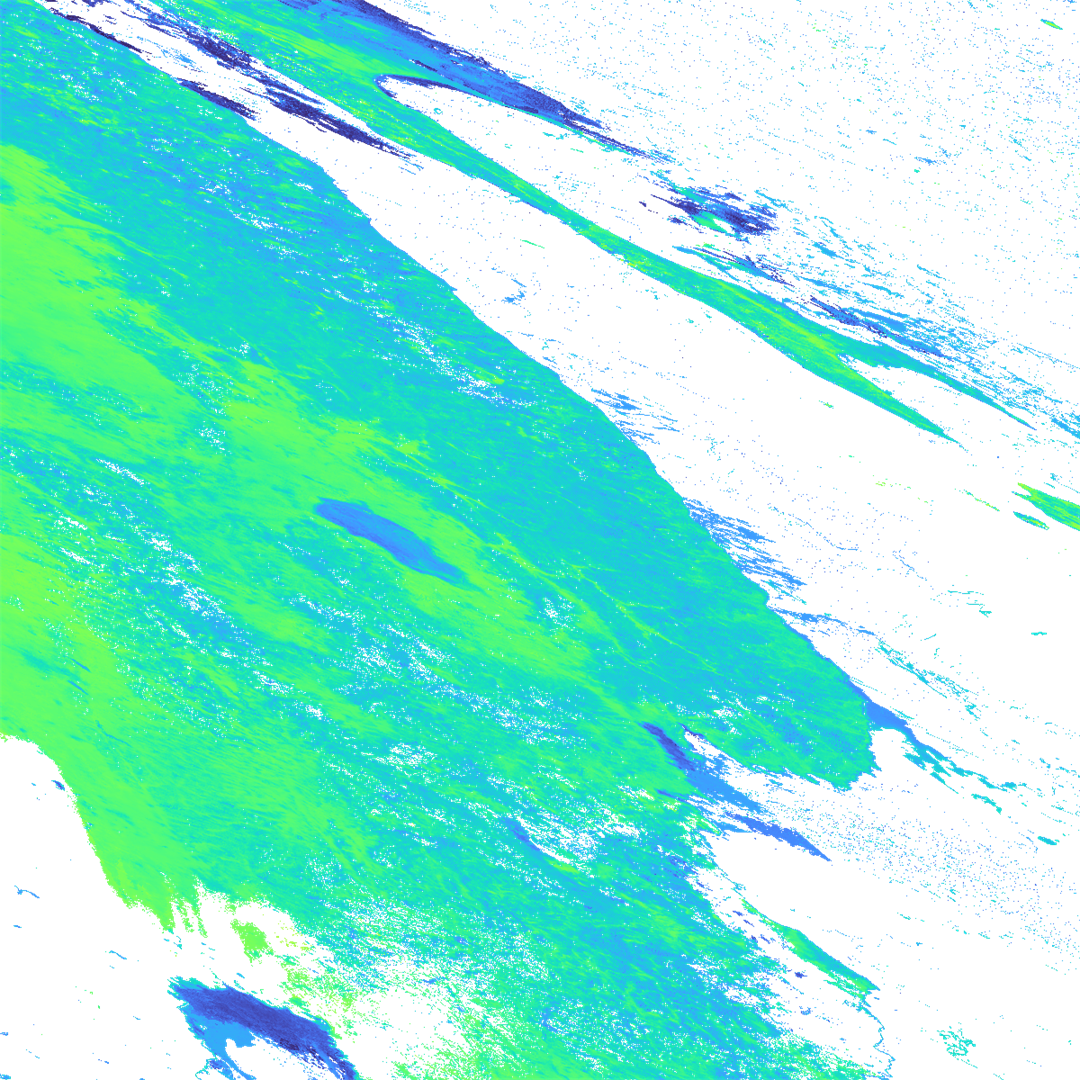
Level-2
Level-2 statistics
(8-day)
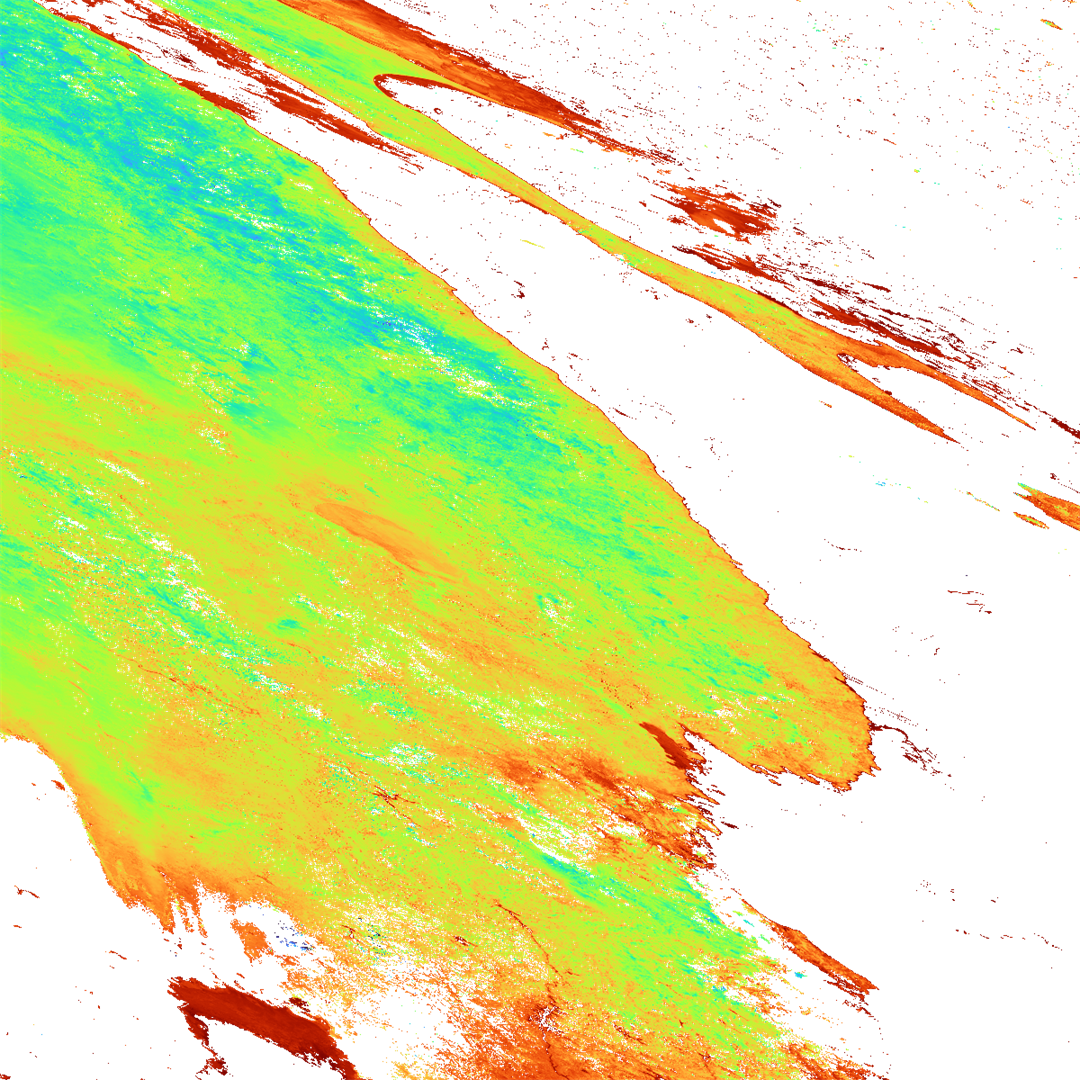
Level-2 statistics
(1-month)
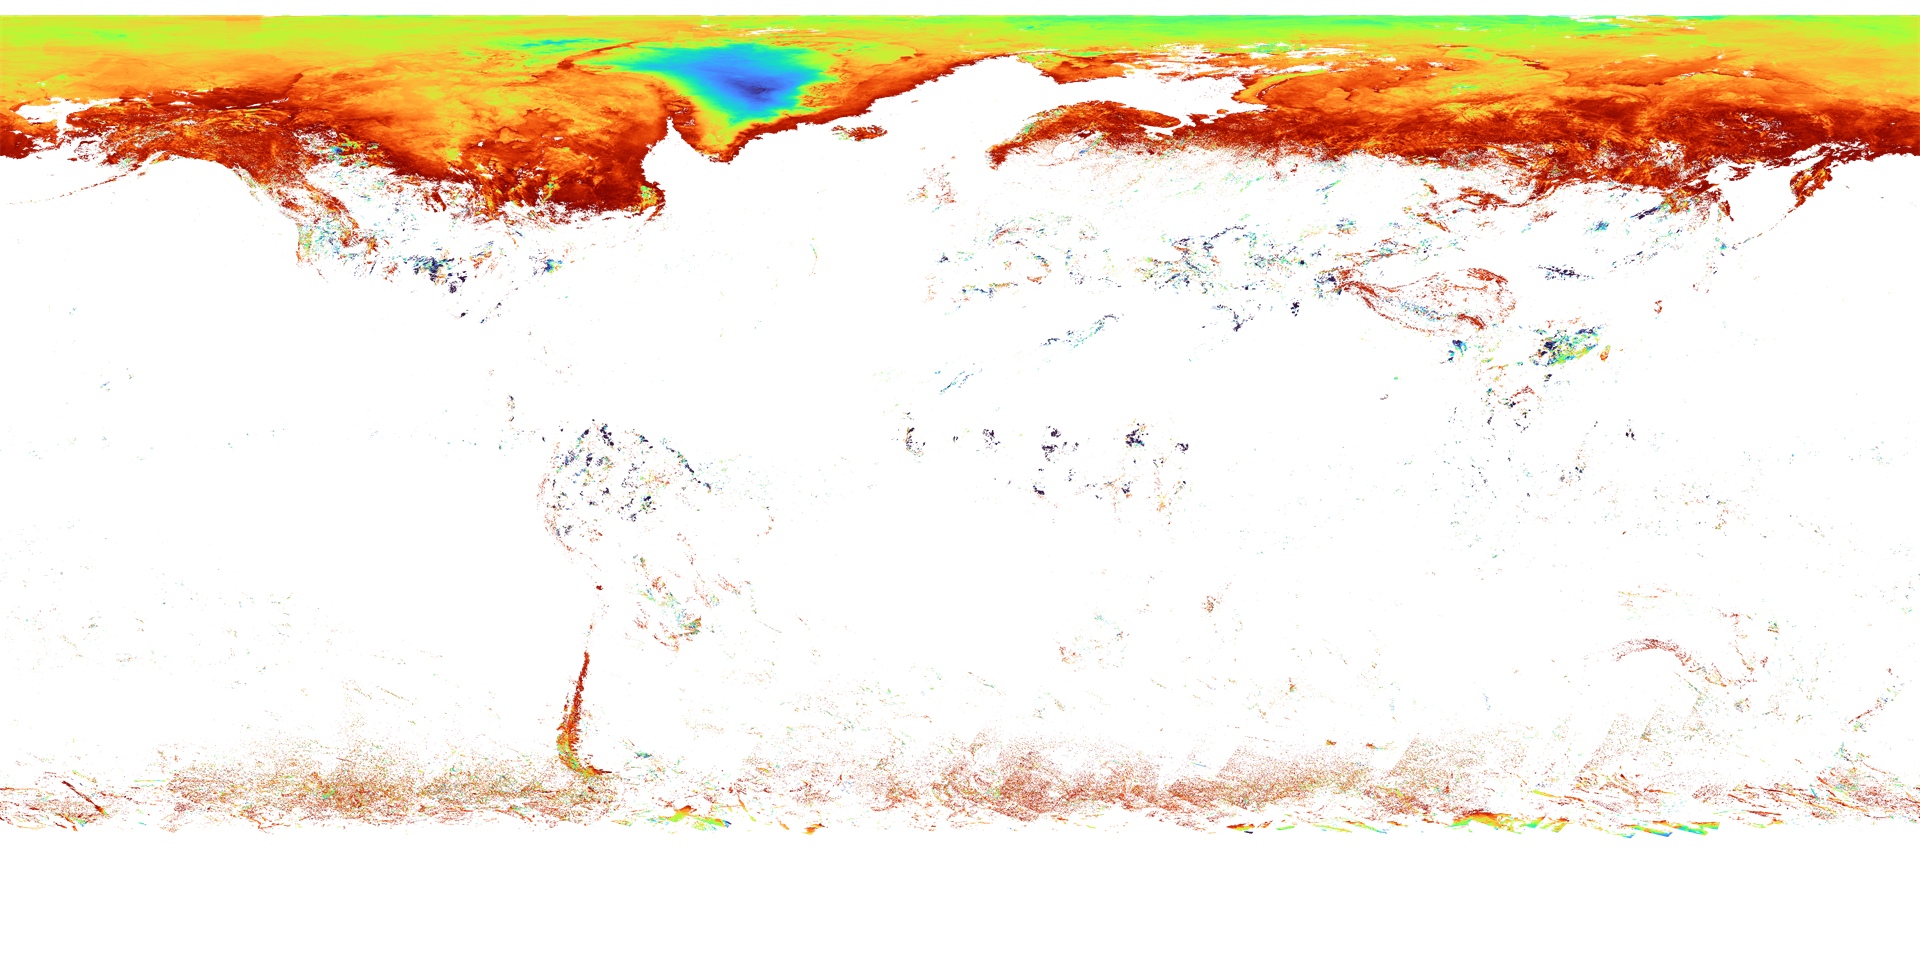
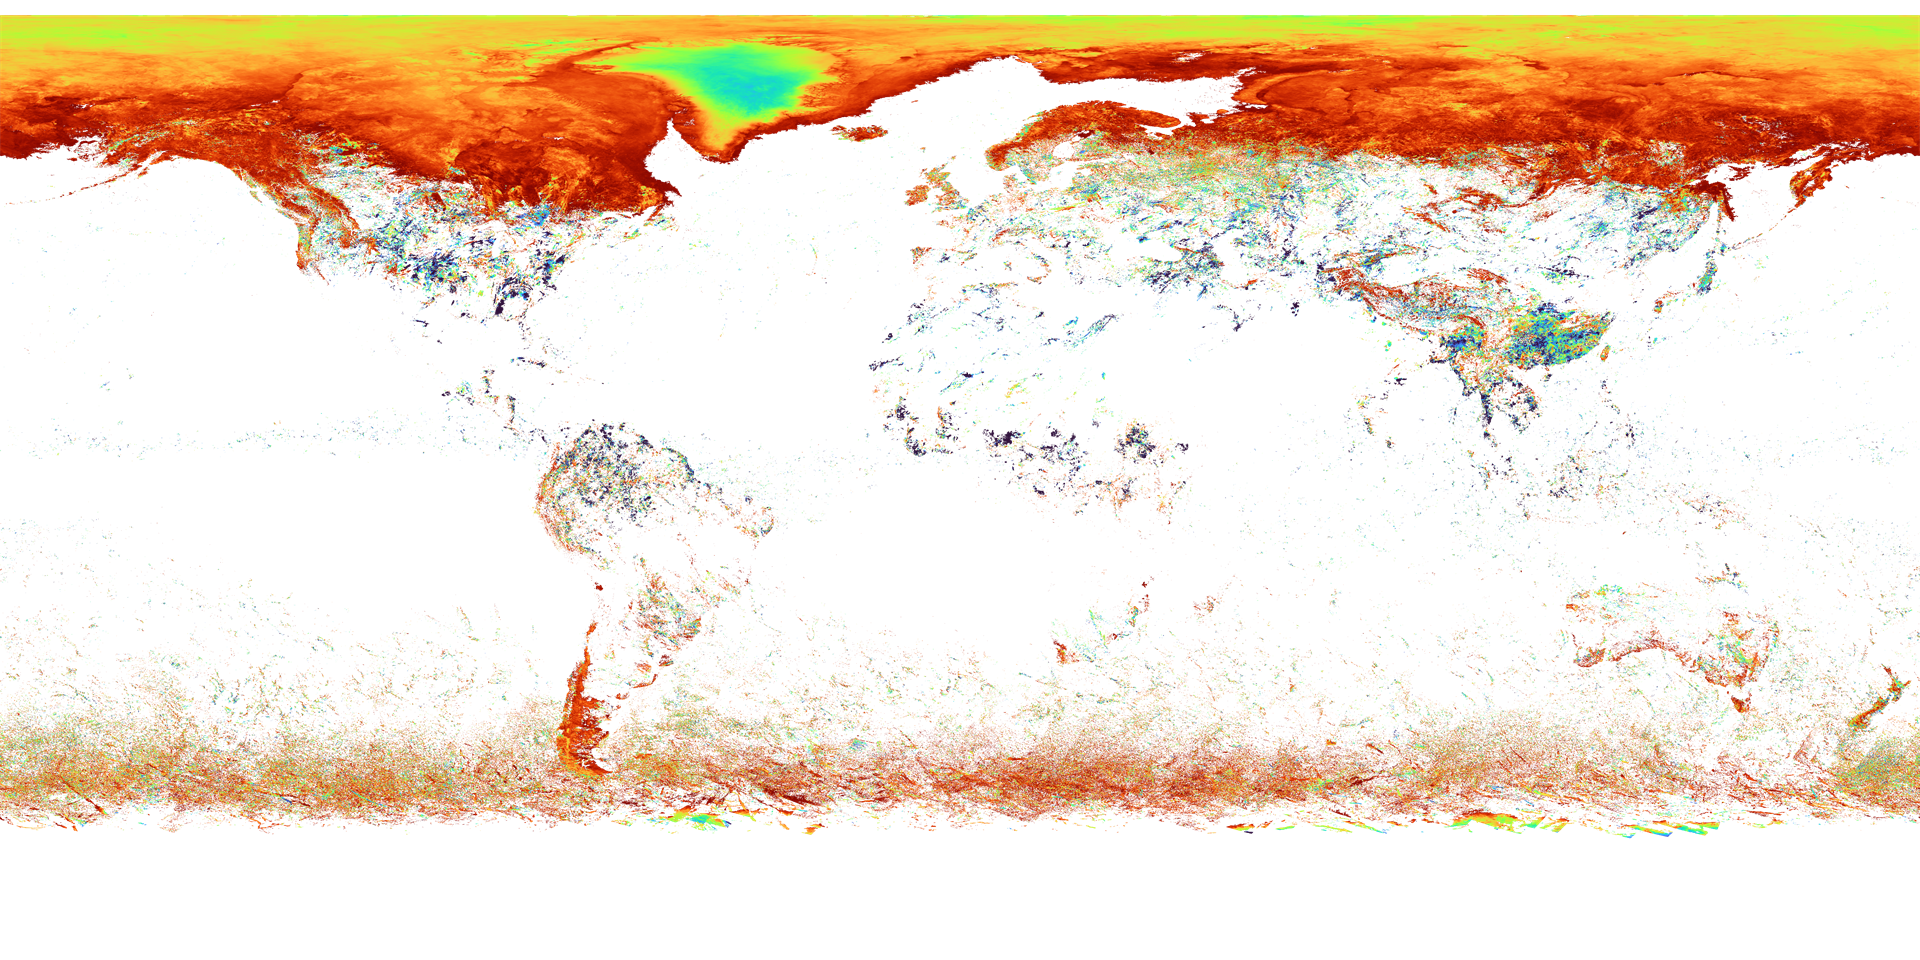
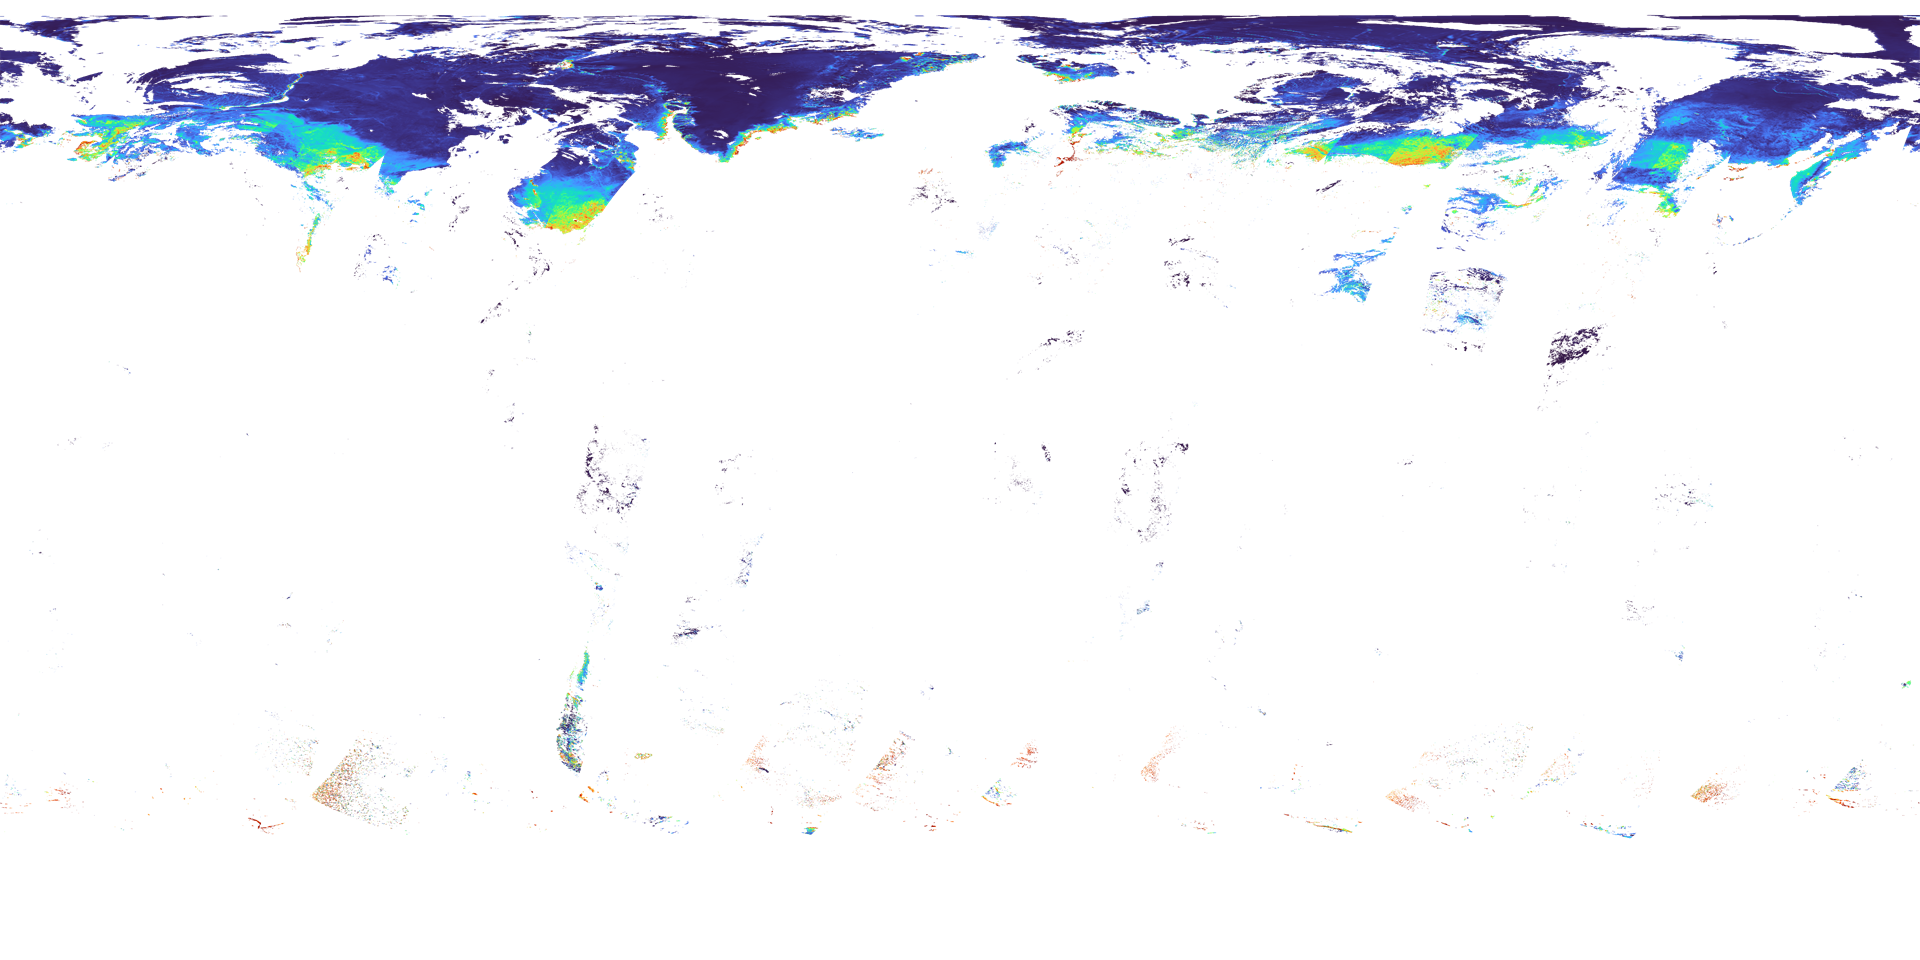
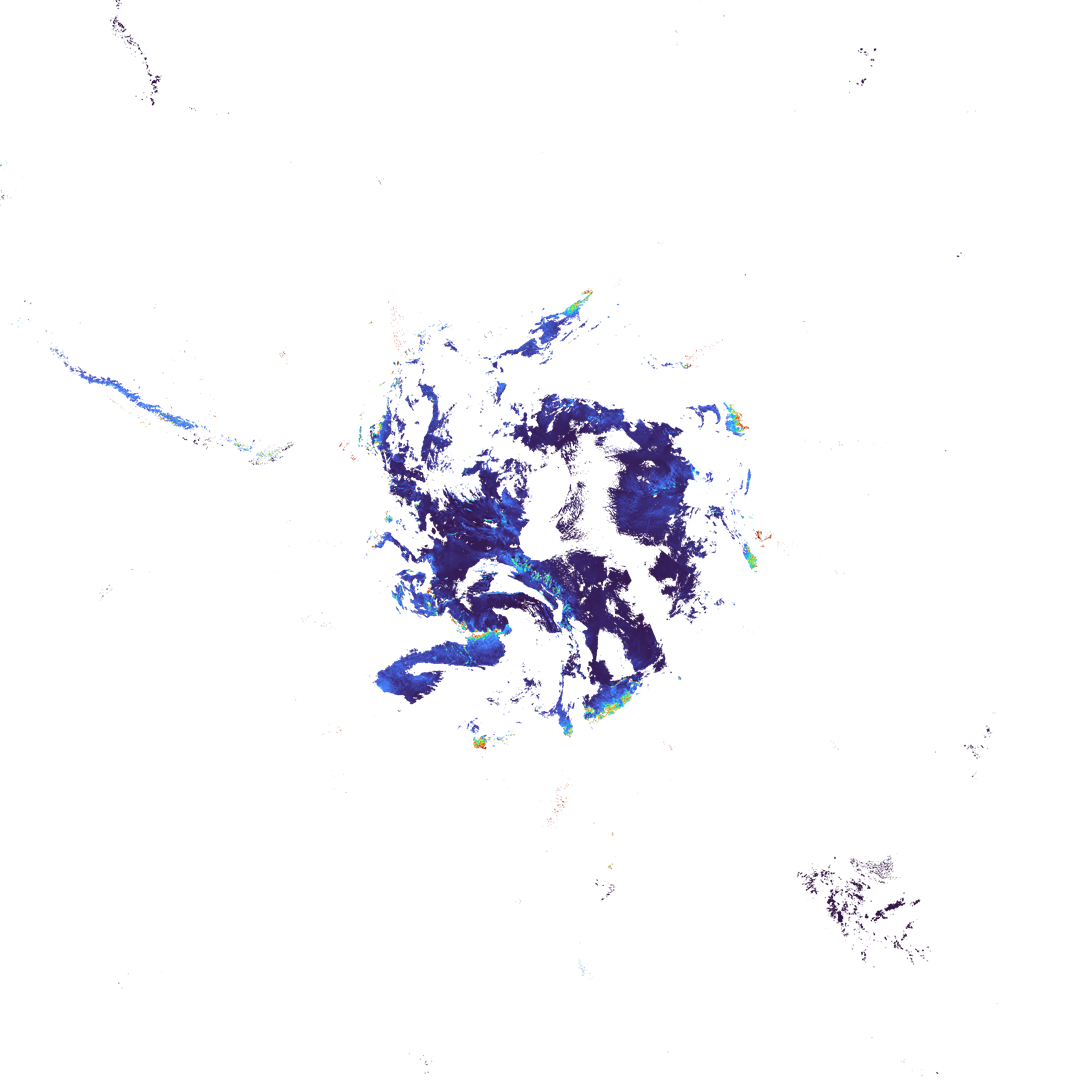
Level-3
(daily statistics)
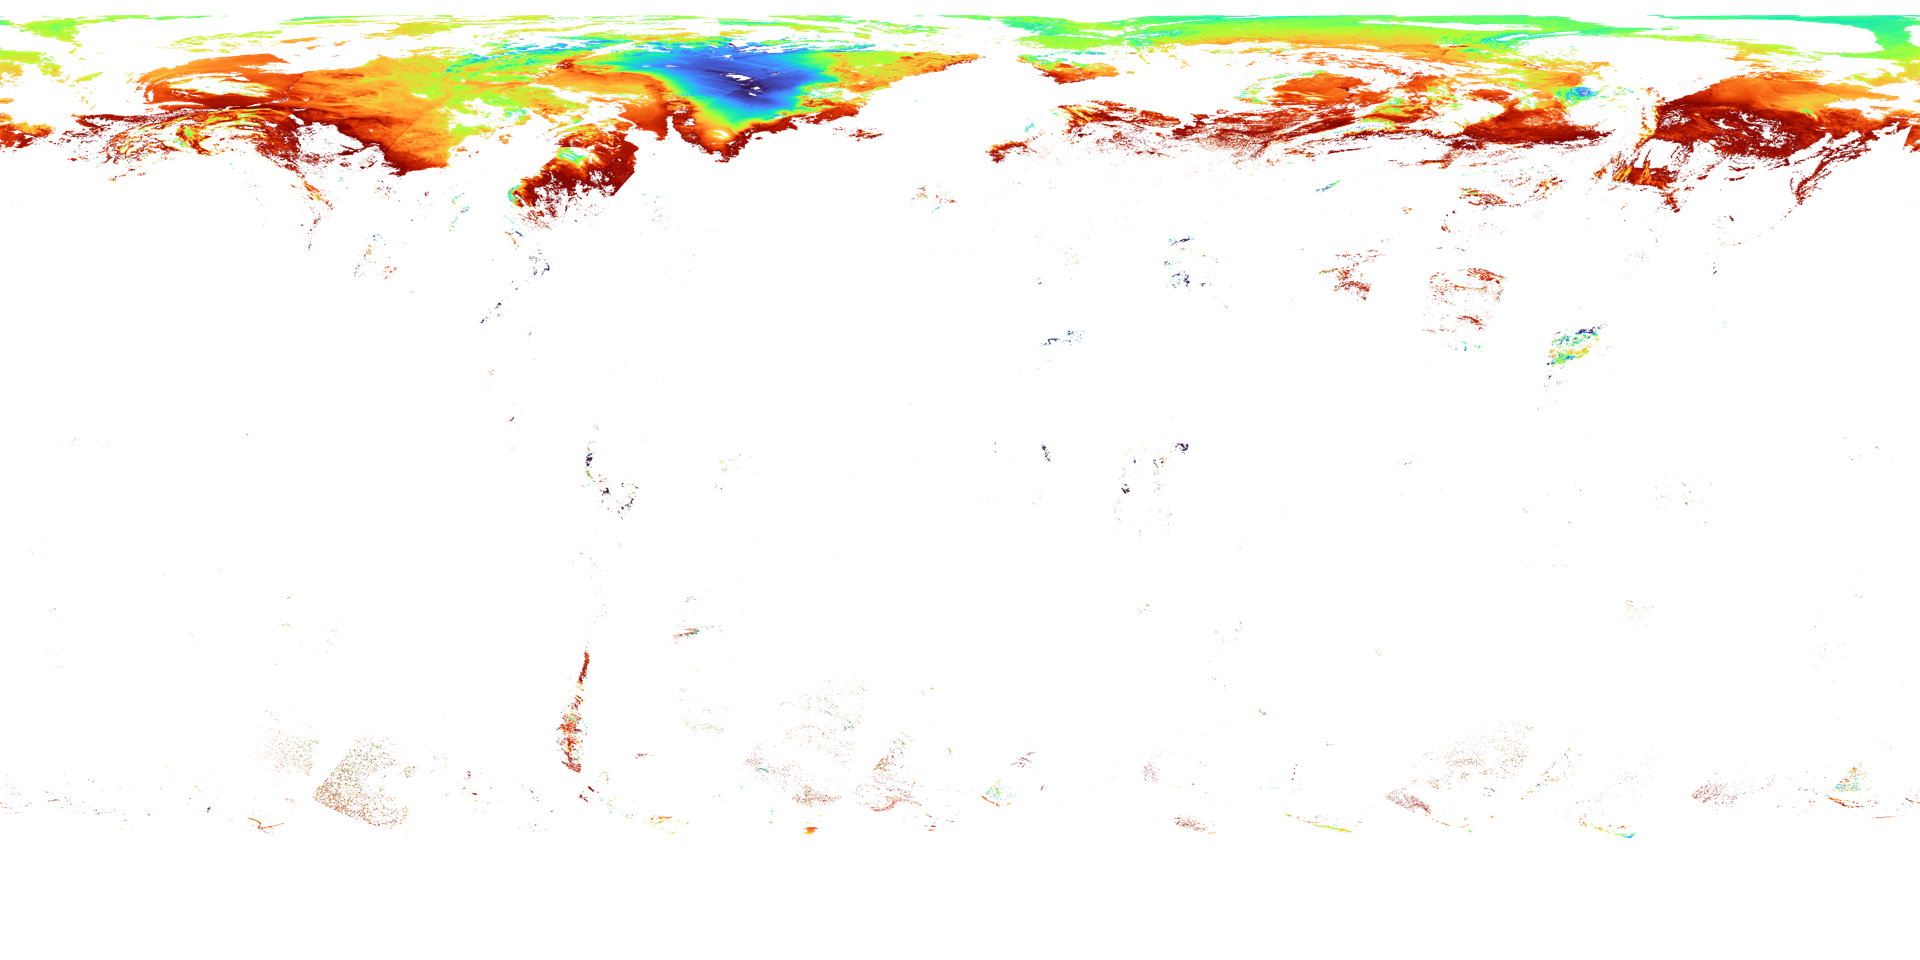
(Left: Arctic Right: Antarctic)
Level-3
(8-day statistics)
(Left: Arctic Right: Antarctic)
Level-3
(1-month statistics)
(Left: Arctic Right: Antarctic)
Physical quantities
SGSL (Snow grain size of the shallow layer)
The grain size of snow ice particles in a shallow layer derived mainly from SGLI 865 nm band reflectance
Resolution
Level-2: 250m, 1km
Level-2 statistics: 1km
Level-3: 1/24deg (4.6km)
Level-2
Level-2 statistics
(8-day)
Level-2 statistics
(1-month)
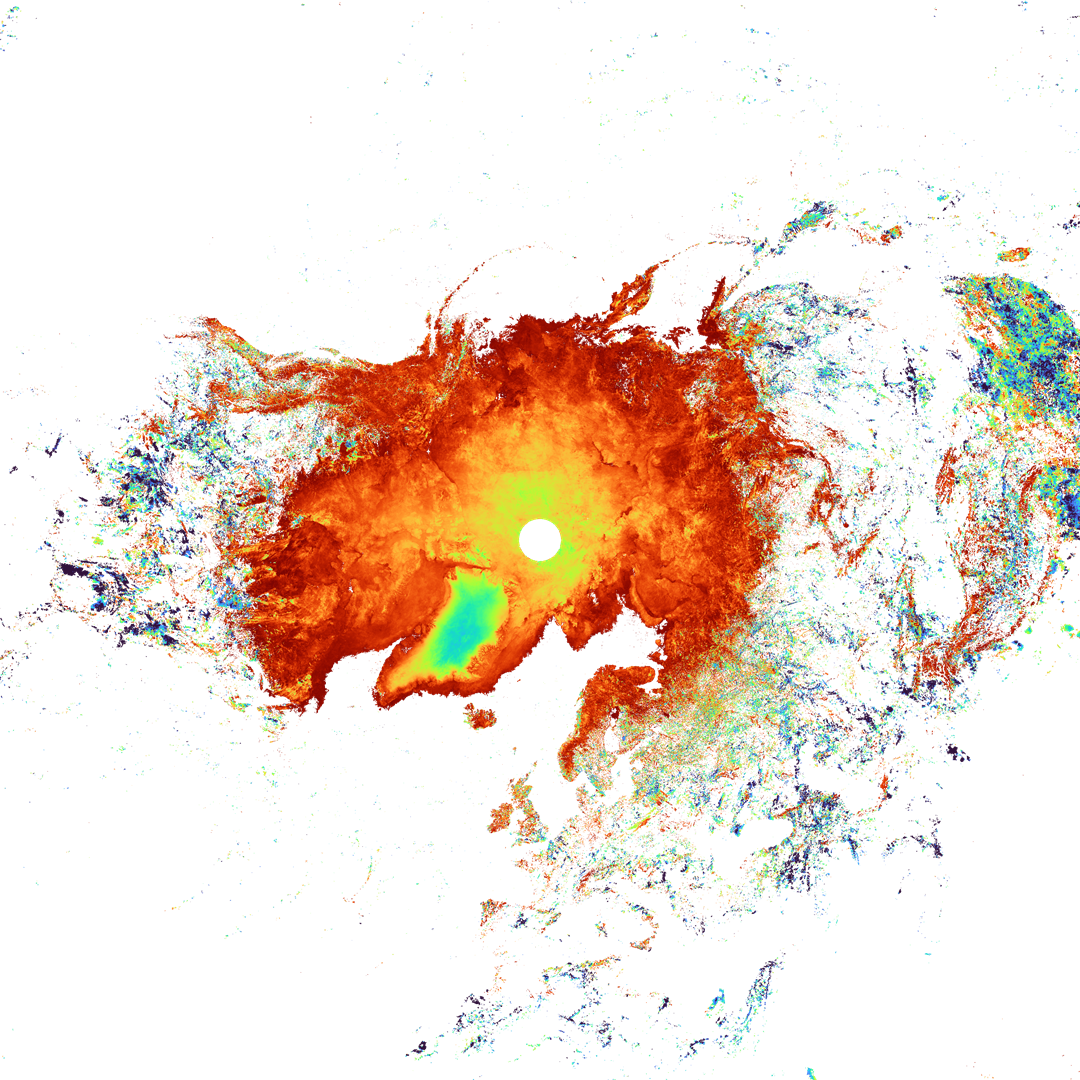
Level-3
(daily statistics)
(Left: Arctic Right: Antarctic)
Level-3
(8-day statistics)
(Left: Arctic Right: Antarctic)
Level-3
(1-month statistics)
(Left: Arctic Right: Antarctic)
Physical quantities
SALB (Snow and ice blue-sky albedo)
Direct retrievals of broadband blue sky snow albedo
Resolution
Level-2: 250m, 1km
Level-2 statistics: 1km
Level-2
Level-2 statistics
(8-day)
Level-2 statistics
(1-month)
The following methods are available to use GeoTIFF files of "SHIKISAI" Level-2/Level-3 data.
* How to convert standard data obtained from G-Portal
- -CUI: SGLI Map projection & GeoTIFF conversion tool (The link to the download site is provided from "Tools" below.)
- -GUI: Earth Observation Data Conversion Tool(Click on the tool name to go to the download page.)
* How to convert netCDF data obtained from the JASMES site to GeoTIFF
- JASMES netCDF data can be read by the Add Layer function in QGIS.
- • GeoTIFF can be converted by QGIS's format conversion function. Global data are centered at 180deg longitude, therefore a reference coordinate system must be set if necessary.
- • Please see the following FAQ for information on converting from the command line.
- https://shikisai.jaxa.jp/faq/faq0092.html
* How to obtain GeoTIFF from G-Portal processing requests
- Request processing of GeoTIFF data from the "Processing" button in the data search results.
- Please refer to the following FAQs for the products covered.
- https://shikisai.jaxa.jp/faq/faq0044.html
Tools
This section provides examples of GeoTIFF conversions using the following tools.
Click on the tool name to go to the download page.
| Target products | Tool name | |
|---|---|---|
Level-2 Level-2 statistics |
SGLI Map projection & GeoTIFF conversion tool |
Link to the "Tools & Documents" page in G-Portal. Platforms: Windows, Linux |
Level-3 |
QGIS(Quantum GIS)/gdal | Link to an external site. Platforms: Windows, Linux |
This section explains converting a GeoTIFF file using the "Tools" above and the HDF5 sample data below.
Data used in the explanation
Please obtain the following data from G-Portal.
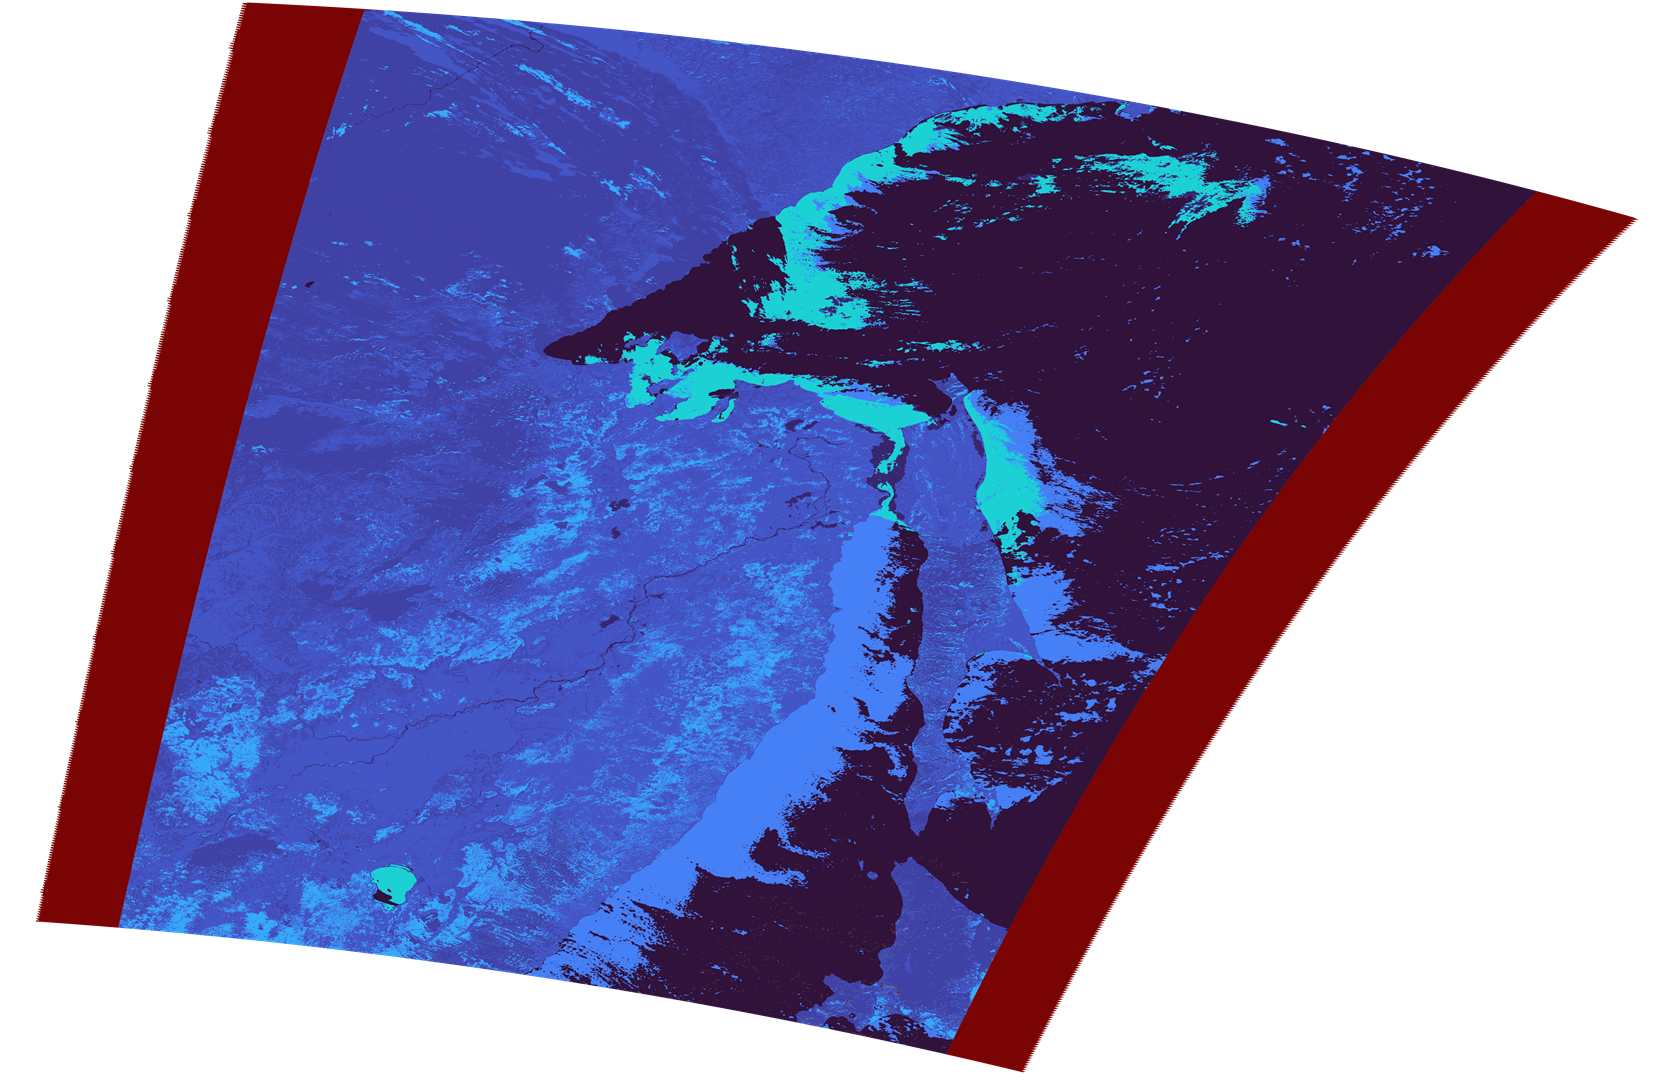
Level-2 SIPR:
Observed 03/09/2022 Hokkaido, Japan (Tile No.0428) Daytime
GC1SG1_20220309D01D_T0428_L2SG_SIPRK_3000.h5 (1MB)
Level-3 SIST:
Monthly statistics for March 2022 Global Daytime
GC1SG1_20220301D01M_D0000_3MSG_SISTF_3000.h5 (5MB)
1) Command for Level-2/Level-2 statistic products (single SD array) conversion
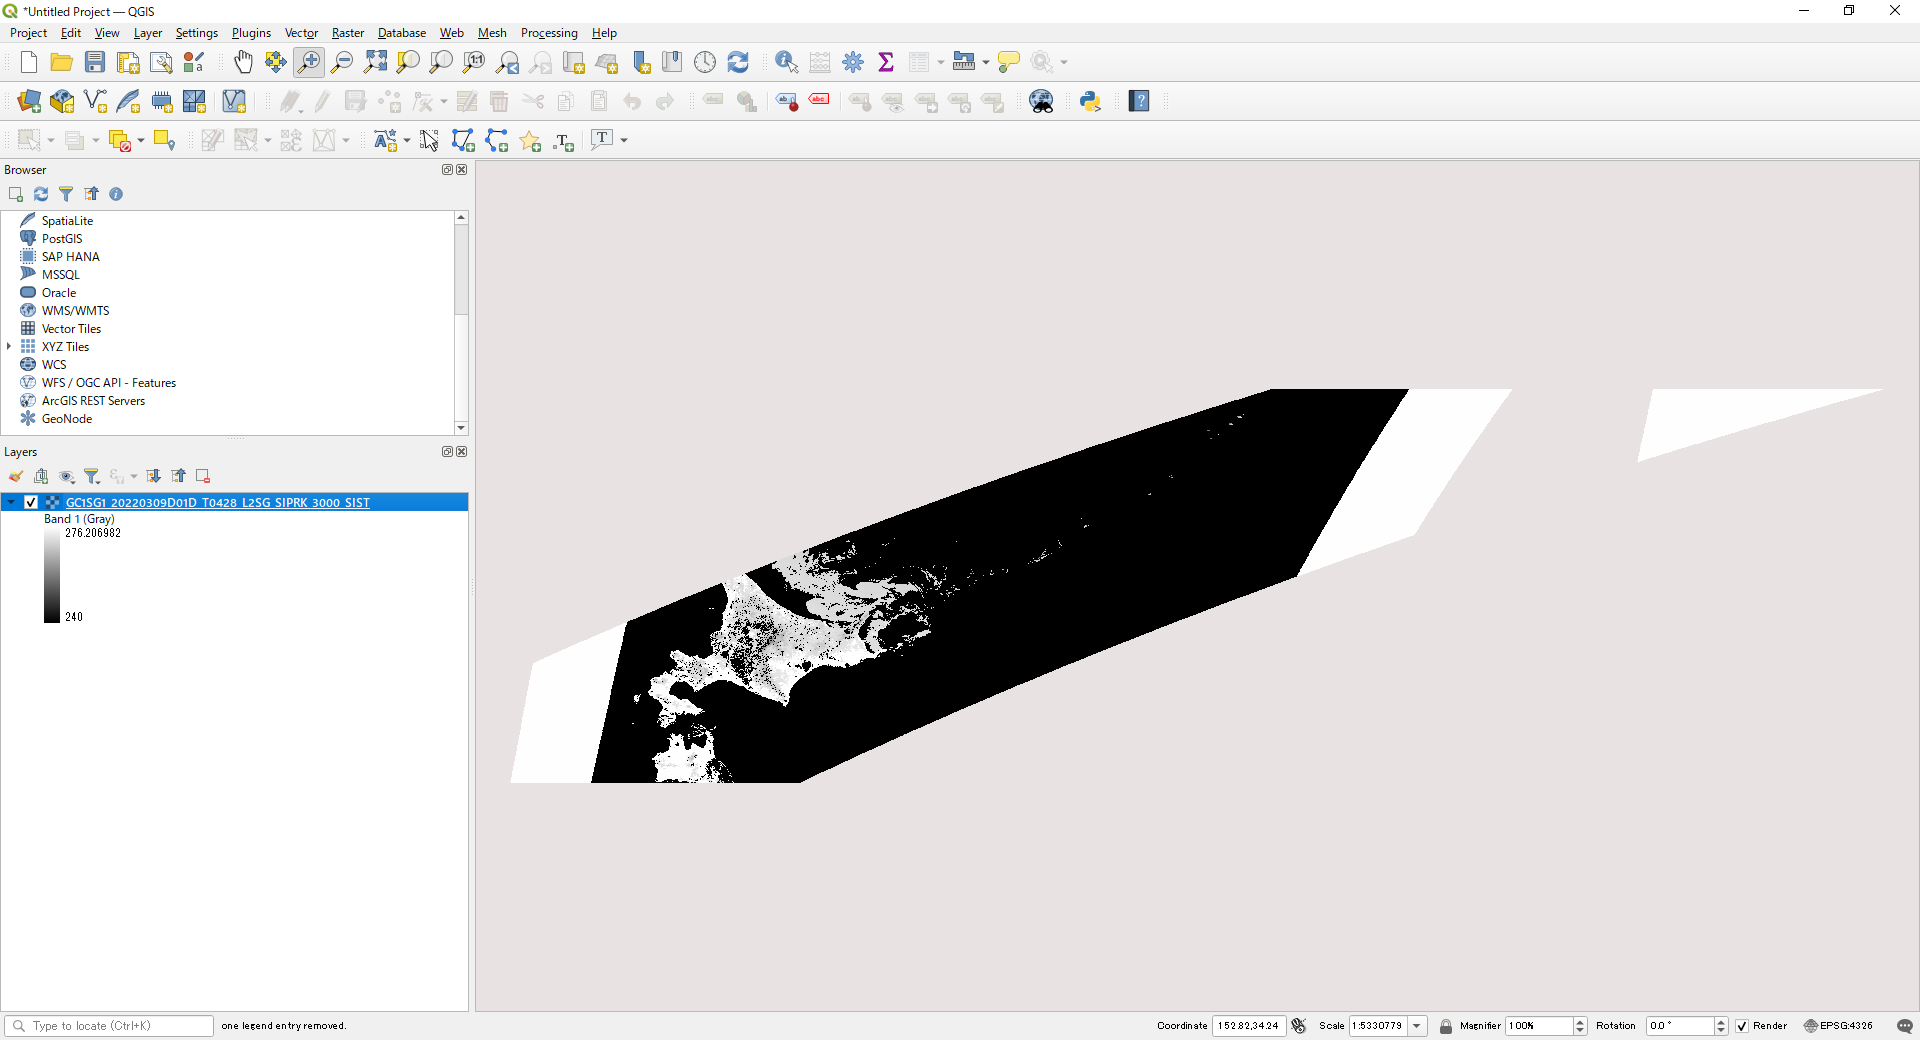
Using The Windows command prompt or the equivalent, go to the directory where "SGLI_geo_map_win.exe" is located.
(The Windows command prompt can be accessed from Windows Start > Windows System > Command Prompt.)
Below is an example where SGLI_geo_map_win.exe and the data folder containing the data are in the sgli_data folder on the C drive.
The command is an example of map projection of an SD array SIST in Image_data and output as an LZW compressed GeoTIFF file.
The pixel value of 65535 is set for an invalid value, and the slope and offset values in the attribute (text information) are stored in the GDAL_METADATA tag.
The values can be found in the tags in the XML file output with the GeoTIFF conversion.
>SGLI_geo_map_win.exe c:\sgli_data\data\GC1SG1_20220309D01D_T0428_L2SG_SIPRK_3000.h5 -d Image_data/SIST -r 0 -a default -n 65535 -z -o c:\sgli_data
For details on optional commands, please refer to the User's manual.
- SGLI_geo_map_win.exe: SGLI Map projection & GeoTIFF conversion tool for Windows
- GC1SG1_20220309D01D_T0428_L2SG_SIPRK_3000.h5: Product name obtained from G-Portal
- -d Image_data/SIST: SD array names (dataset name) in Image_data to be converted
- -r 0: Resampling method (NN)
- -a default: Set conversion coefficients (slope/offset) for physical quantities. If the software supports it, like QGIS, the converted values will be displayed (the data will retain their original values).
- -n 65535: Set an invalid value
- -z: Apply LZW compression
- -o C:\sgli_data: Set any output destination
See "GeoTIFF Tag Information" for the tag information stored in the converted GeoTIFF file.
Converted image displayed in QGIS
2) Combining multiple SD arrays of Level-2/Level-2 statistic products into one file
Using The Windows command prompt or equivalent, go to the directory where "SGLI_geo_map_win.exe" is located.
(The Windows command prompt can be accessed from Windows Start > Windows System > Command Prompt.)
Below is an example where SGLI_geo_map_win.exe and the data folder containing the data are in the sgli_data folder on the C drive.
The command is an example of map projection of SD arrays SIST, QA_Flag in Image_data, and output in a single LZW compressed GeoTIFF file.
The pixel value of 65535 is set for an invalid value, and the slope and offset values in the attribute (text information) are stored in the GDAL_METADATA tag.
The values are in the tags in the XML file output with the GeoTIFF conversion.
* To output two files, one geophysical and one QA_flag, in a single GeoTIFF and display them in QGIS, set Layer Properties > Symbology > Rendering Type to single band gray.
>SGLI_geo_map_win.exe c:\sgli_data\data\GC1SG1_20220309D01D_T0428_L2SG_SIPRK_3000.h5 -c SIST,QA_flag -r 0 -a default -n 65535 -z -o c:\sgli_data
For details on optional commands, please refer to the User's manual.
- SGLI_geo_map_win.exe: SGLI Map projection & GeoTIFF conversion tool for Windows
- GC1SG1_20220210D01D_T0428_L2SG_SIPRK_3000.h5: Product name obtained from G-Portal
- -c SIST,QA_flag: SD array names (dataset names) in Image_data to be converted
- -r 0: Resampling method (NN)
- -a default: Set the conversion factor (slope/offset) for the geophysical quantity. If the software supports it, like QGIS, the converted values will be displayed (the data will retain their original values).
- -n 65535: Set an invalid value
- -z: Apply LZW compression
- -o C:\sgli_data: Set any output destination
See "GeoTIFF Tag Information" for the tag information stored in the converted GeoTIFF file.
3) The gdal command during Level-3 product conversion
To use the gdal command, start the OSgeo4W Shell.
(The OSgeo4W Shell can be accessed from Windows Start > QGIS 3.22.8 > OSgeo4W Shell for a typical installation. The above GeoTIFF output tool is also available from the OSgeo4W Shell.)
Navigate to the directory where the data to be converted to GeoTIFF is stored.
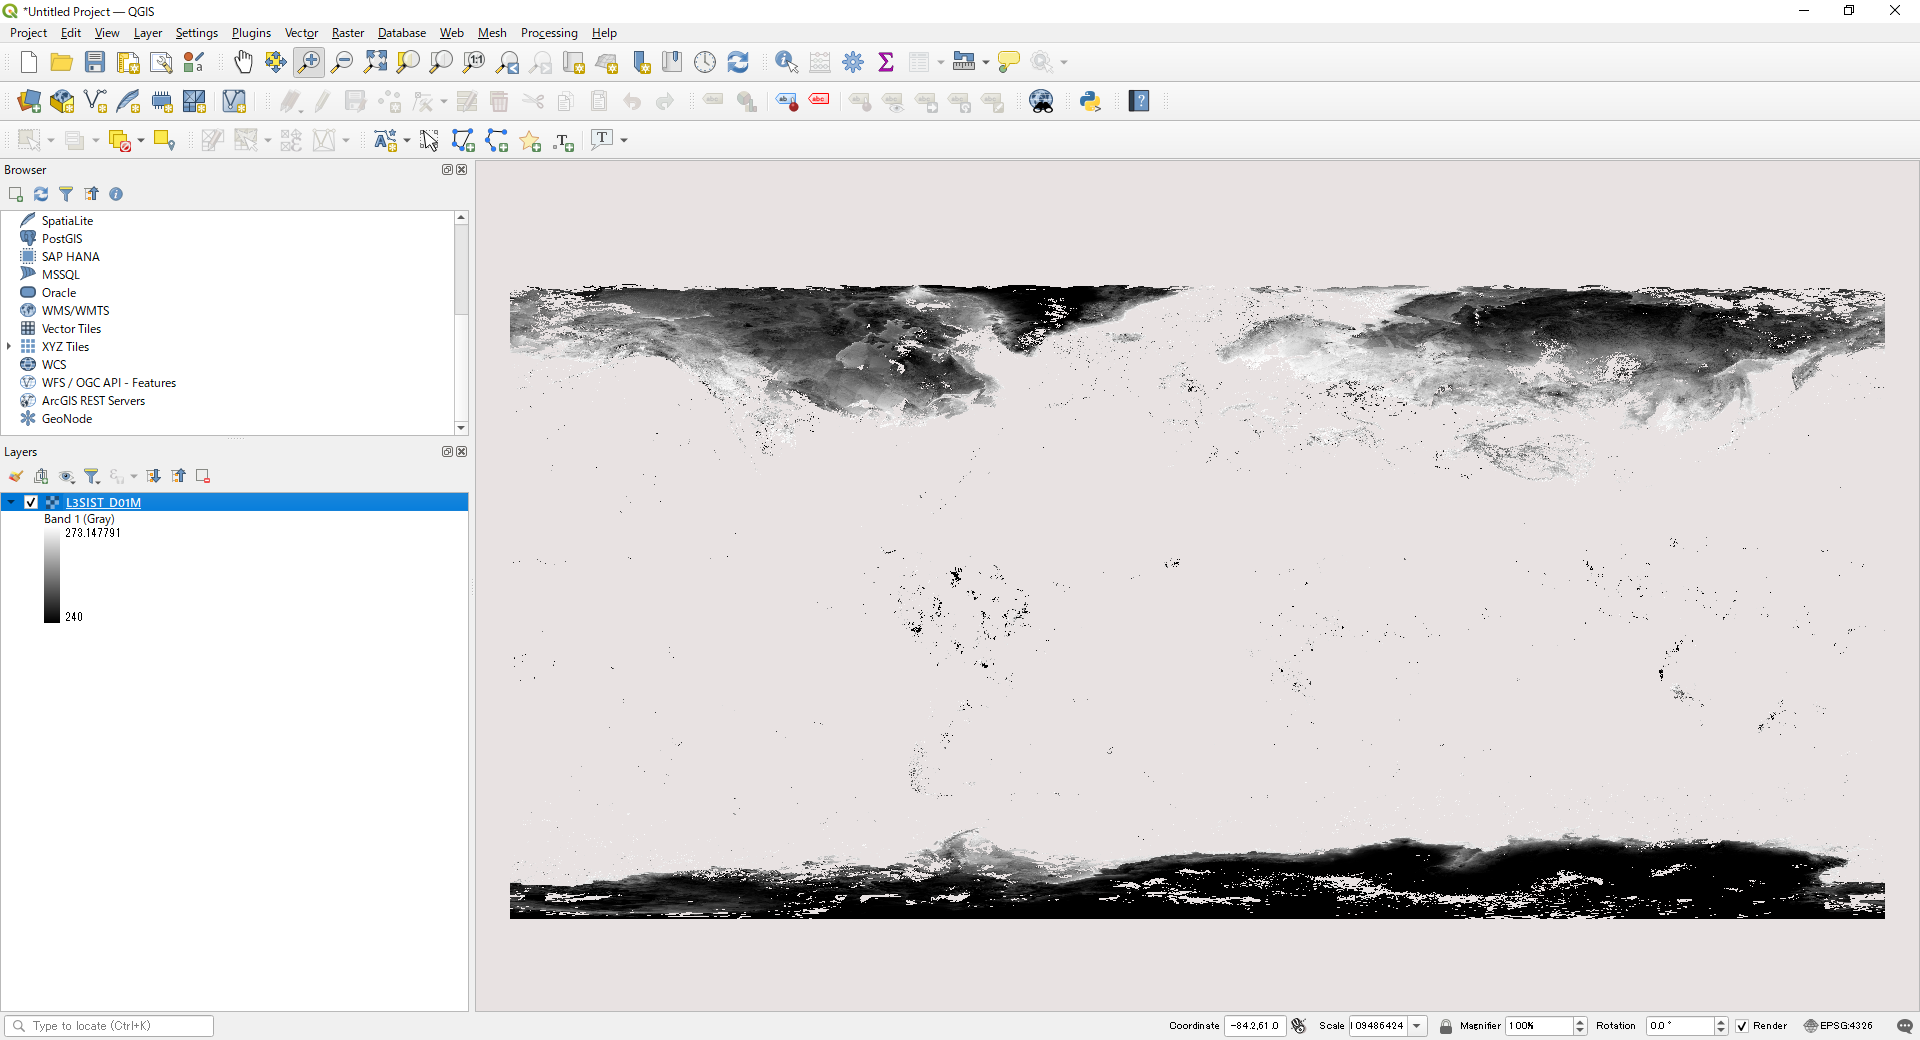
The command is an example of map projection of the SD array SIST_AVE in Image_data and output as an LZW compressed GeoTIFF file.
The pixel value of 65535 is set for an invalid value, and the slope and offset values in the attribute (text information) are stored in the GDAL_METADATA tag.
Slope and offset values can be checked with the gdalinfo command, HDFView (tool download required), etc.
For an example, please refer to "How to confirm SD array names of Level-2/Level-3 Cryosphere products."
>cd C:\sgli_data
>gdal_translate -of GTiff -a_srs EPSG:4326 -a_ullr -180 90 180 -90 -a_nodata 65535 -a_scale 0.00055250002 -a_offset 240 -co COMPRESS=LZW HDF5:"GC1SG1_20220301D01M_D0000_3MSG_SISTF_3000.h5"://Image_data/SIST_AVE L3SIST_D01M.tif
- gdal_translate: Format conversion commands
- -of GTiff: Set GeoTIFF output
- -a_srs EPSG:4326: Set the reference coordinate system for the input file.
- -a_ullr -180 90 180 -90: Set the upper left and lower right coordinate values (longitude and latitude).
- -a_nodata 65535: Set an invalid value
- -a_scale, -a_offset: Set the slope and offset values.
- -co COMPRESS=LZW: Set LZW compression.
- HDF5:"GC1SG1_20220301D01M_D0000_3MSG_SISTF_3000.h5"://Image_data/SIST_AVE: Information on SUBDATASET_X_NAME to be converted when displayed in gdalinfo (X: number)
- L3SIST_D01M.tif: Sets the output file name.
Converted image displayed in QGIS
4) The gdal command for applying QA_flag to Level-2/Level-3 products
Here is an example of applying QA_flag information to SIST data created with the "SGLI Map projection & GeoTIFF conversion tool."
Convert the SIST and QA_flag to GeoTIFF using option "-c" in the "SGLI Map projection & GeoTIFF conversion tool."
The following command extracts data for which the flag of the 4th-6th bit (snow coverage) in a pixel set in QA of SIST is other than "111 (7)" and the flag of the 2nd bit (cloud coverage) is "0 (0)." The flag is "0" or "1."
Information on SIST's QA_flag can be found in the "Products and Algorithms" section of the EORC GCOM-C website (https://suzaku.eorc.jaxa.jp/GCOM_C/data/update/Algorithm_SIPR_en.html).
>cd C:\sgli_data
>gdal_calc -A GC1SG1_20220309D01D_T0428_L2SG_SIPRK_3000_SIST_QA_flag.tif --A_band=2 --outfile=L2SIST_QA_flag.tif --calc="(((A >> 4) & 7) < 7) * (((A >> 2) & 1) == 0) * 1" --NoDataValue=65535
- gdal_calc: gdal command to perform calculations on the data
- -A: Set the file name used in the formula to "A."
- GC1SG1_20220309D01D_T0428_L2SG_SIPRK_3000_SIST_QA_flag.tif: File name to be calculated
- --A_band=2: Set the order in GeoTIFF where QA_flag is stored
- --outfile: Set any output file name for calculation results
- --calc: Set up calculation formulas
- (A >> 4) & 7: Shift the bit information by 4 bits to the right. Only the upper bits are left. Also, extract the 4th-6th bit by bit AND calculation.
- < 7: Extracts data where the extracted 4-6 bits have a snow cover of 111(7) or less.
- (A >> 2) & 1: Shift the bit information by 4 bits to the right. Only the upper bits are left. Also, the second bit is extracted by bit AND calculation.
- == 0: Extracts data in which the extracted 2 bits have no clouds of 0 (zero).
- * 1: If all the conditional expressions are satisfied, "1" is set. For convenience, "*1" is set, but it does not matter if "*1" is not set, since "1" will be set if the expressions are satisfied.
- --NoDataValue: Set an invalid value
Example of bit calculation
* A >> 4 or right_shift(A, 4) ------ If A has the pixel value (decimal: 18431) "01000111111111111111", it is shifted right by 4. The data will be for "010001111111".
* A & 7 or bitwise_and(A, 7) ------ Performs a "111" (decimal: 7) bit operation on the pixel value of A. Extract 4-6 bits of the original data.
| 010001111111 | (1151) | ||
| & | 000000000111 | (7) | |
| --------------------- | |||
| 000000000111 | (7) | ||
(0 and 0 --> 0, 1 and 1 --> 1, 0 and 1 --> 0)
Create SIST data using the created QA_flag data.
>gdal_calc -A GC1SG1_20220309D01D_T0428_L2SG_SIPRK_3000_SIST_QA_flag.tif --A_band=1 -B L2SIST_QA_flag.tif --outfile=L2SIST_addQA.tif --calc="(A <= 59999) * (B == 1) * A + (A <= 59999) * (B == 0) * 65535 + (A > 59999) * (B == 1) * 65535 + (A > 59999) * (B == 0) * 65535" --NoDataValue=65535
- gdal_calc: gdal command to perform calculations in the data
- -A, -B: Set "A" and "B" as file names to be used in formulas
- GC1SG1_20220309D01D_T0428_L2SG_SIPRK_3000_SIST_QA_flag.tif: Set to "A" the name of the file to be calculated
- L2SIST_QA_flag.tif: Set the file name from which flags are extracted to "B."
- --A_band=1: Set the order in GeoTIFF where SIST is stored
- --outfile: Set any output file name for calculation results
- --calc: Set up calculation formulas
- (A <= 59999) * (B == 1) * A: If the A data are within the valid range and the B data are "1," the A value is left unchanged. Calculations using slope/offset are also possible.
- (A <= 59999) * (B == 0) * 65535: The data where A data are within the valid range and B data are "0" are assigned to the invalid value.
- (A > 59999) * (B == 1) * 65535: The data where A data are outside the valid range and B data are "1" are assigned to the invalid value.
- (A > 59999) * (B == 0) * 65535: The data where A data are outside the valid range and B data are "0" are assigned to invalid values.
Set slope/offset with gdal_edit.
>gdal_edit -scale 0.00055250002 -offset 240 L2SIST_addQA.tif
QGIS display of SIST image with QA_flag applied
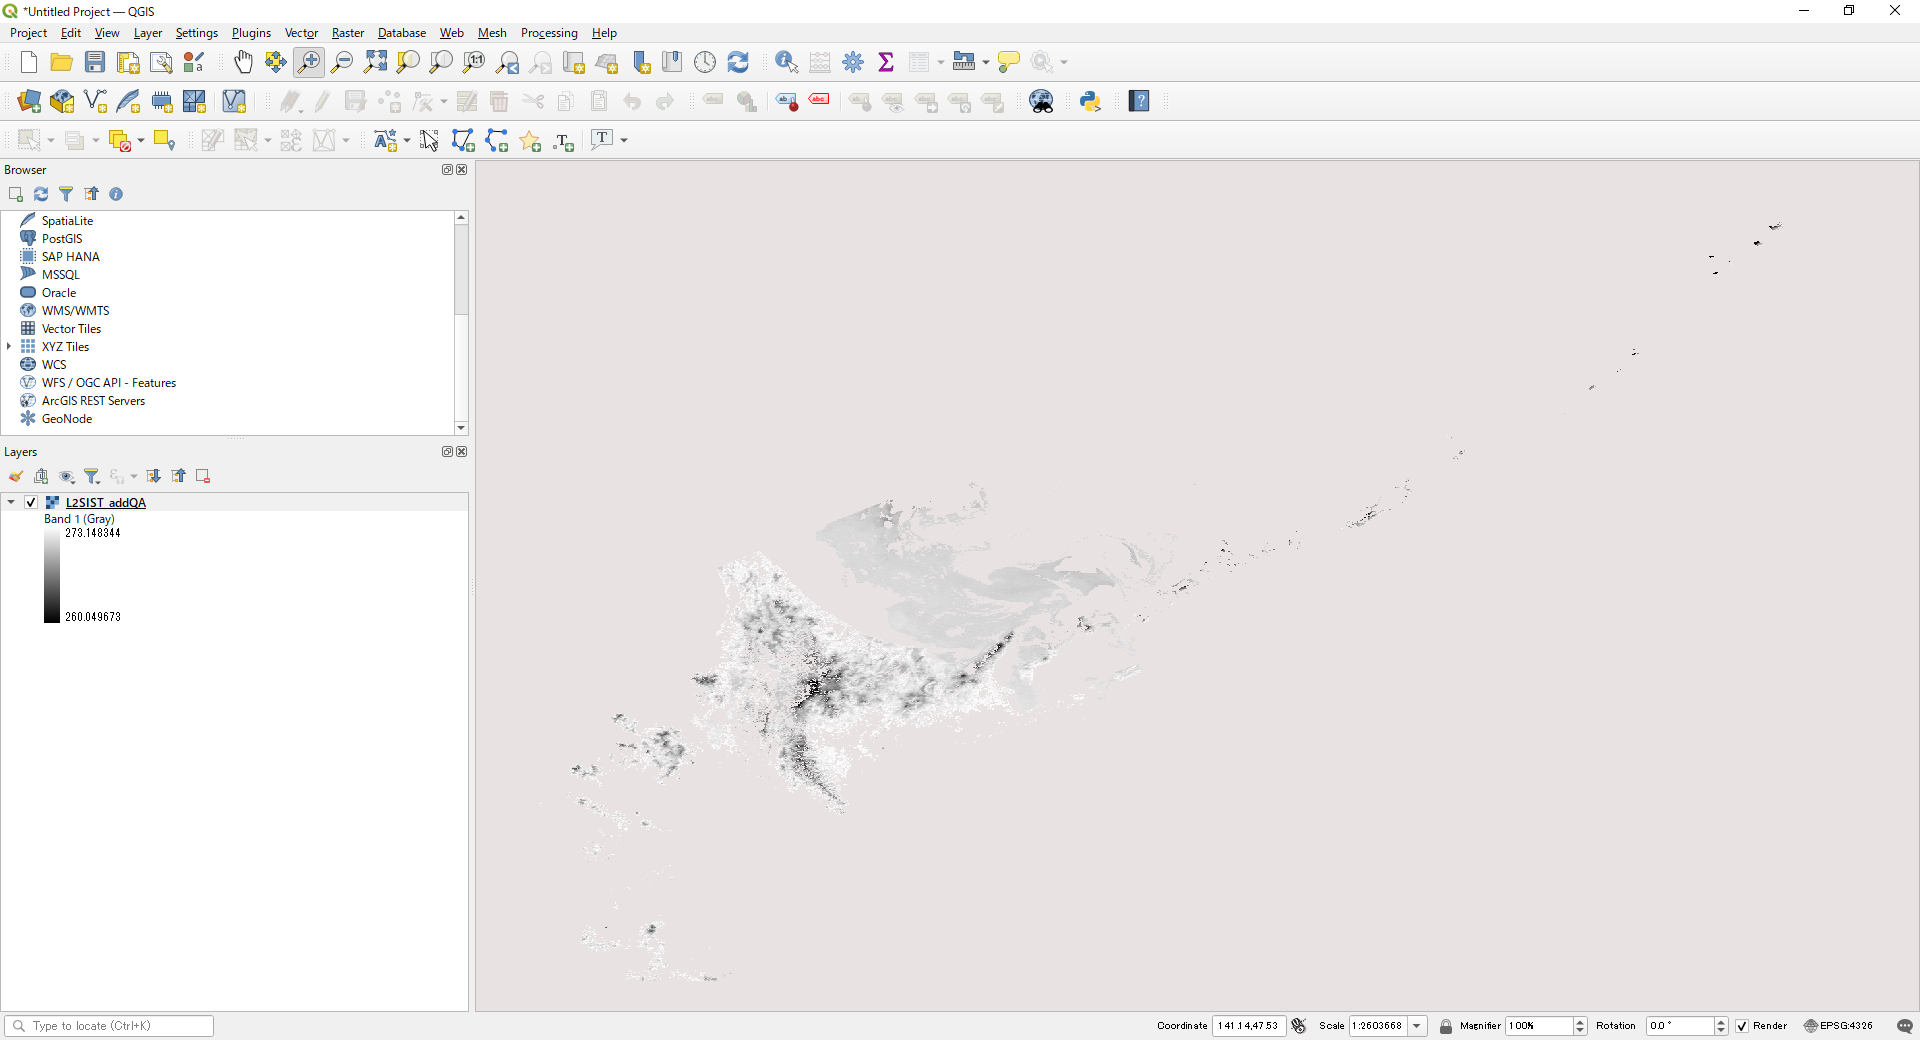
The application of the QA_flag for Level-3 products is the same as for Level-2. Apply the QA_flag as necessary.
The following is an example of excluding pixels with no input data and pixels with error flags.
>gdal_translate -of GTiff -a_srs EPSG:4326 -a_ullr -180 90 180 -90 -co COMPRESS=LZW HDF5:"GC1SG1_20220301D01M_D0000_3MSG_SISTF_3000.h5"://Image_data/SIST_QA_flag L3SIST_D01M_QA_flag.tif
>gdal_calc -A L3SIST_D01M_QA_flag.tif --outfile=L3SIST_D01M_QA_flag_cal.tif --calc="(A > 253) * 0 + (A <= 253) * 1"
>gdal_calc -A L3SIST_D01M.tif -B L3SIST_D01M_QA_flag_cal.tif --outfile=L3SIST_D01M_addQA.tif --calc="(A <= 59999) * (B == 1) * A + (A <= 59999) * (B == 0) * 65535 + (A > 59999) * (B == 1) * 65535 + (A > 59999) * (B == 0) * 65535" --NoDataValue=65535
- gdal_translate: Format conversion commands.
For a description of the commands, see "3) gdal command example for Level-3 product conversion." - gdal_calc: gdal command to perform calculations in the data
In the first gdal_calc, the values outside the valid range of the QA_flag are set to "0," and the values within the valid range are set to "1."
The second gdal_calc is as follows - -A, -B: Set "A" and "B" as file names to be used in formulas
- L3LST_A01M.tifL3SIST_D01M_QA_flag.tif: Set to "A" the name of the file to be calculated
- L3SIST_D01M_QA_flag_cal.tif: Set the file name from which flags are extracted to "B."
- --outfile: Set any output file name for calculation results
- --calc: Set up calculation formulas
- (A <= 59999) * (B == 1) * A: If the A data are within the valid range and the B data are "1", the A value is left unchanged. Calculations using slope/offset are also possible.
- (A <= 59999) * (B == 0) * 65535: The data where A data are within the valid range and B data are "0" are assigned to the invalid value.
- (A > 59999) * (B == 1) * 65535: The data where A data are outside the valid range and B data are "1" are assigned to the invalid value.
- (A > 59999) * (B == 0) * 65535: The data where A data are outside the valid ranges and B data are "0" are assigned to invalid values.
Set slope/offset with gdal_edit.
>gdal_edit -scale 0.00055250002 -offset 240 L3SIST_D01M_addQA.tif
QGIS display of L3 SIST image with QA_flag applied

5) How to Confirm SD array names of Level-2/Level-3 Cryosphere products
For SD array names, please refer to "SD Array Names of Level-2/Level-3 Cryosphere Products" below.
For more information, please visit the EORC GCOM-C "Standard Products and Algorithms" website.
The SD array can be checked in the following ways.
For GeoTIFF conversion of Level 3 products, please use gdalinfo of gdal.
| gdalinfo | HDFView |
|---|---|
If you have a typical QGIS installation, please use the OSGeo4W Shell. (Start Menu > QGIS 3.22.8 > OSGeo4W Shell) for version 3.22 Go to the directory containing the data to be converted and enter gdalinfo followed by the file name. Image_data_xxx_Offset, Slope corresponds to offset, scale in gdal. After "Image_data/" in SUBDATASET is the SD array name; for conversion in gdal, specify the underlined part. |
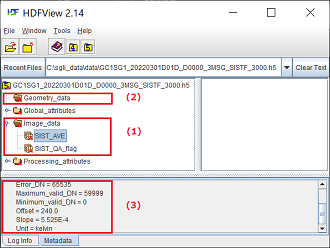
Example of Level-3 SIST display. (1) SD array name in Image_data (2) SD array name in Geometry_data (only folder if not included) (3) Additional information on SIST_AVE, slope, offset information, etc. |
>gdalinfo GC1SG1_20220301D01D_D0000_3MSG_SISTF_3000.h5
Image_data_SIST_AVE_Error_DN=65535 |
|
6) SD array names of Level-2/Level-3 Cryosphere Products
| Product name | Physical quantity | ID | SD array name(dataset name) | |
|---|---|---|---|---|
| Level-2 | SICE (Snow and Ice covered area) |
Snow and Ice covered area |
SICE |
SICE |
OKID (Okhotsk sea-ice distribution) |
Okhotsk sea-ice distribution |
OKID |
OKID |
|
SIPR (Snow and Ice Physical Properties) |
SGSL (snow grain size of shallow layer) |
SIPR |
SGSL |
|
SIST (snow and ice surface temperature) |
SIST |
|||
SALB (snow and ice blue-sky albedo) |
SALB |
|||
| Level-2 statistics | SICE (Snow and Ice covered area) |
Snow and Ice covered area |
SICE |
SICE_Nsnow1, SICE_Nsnow2, SICE_Nsnow3 |
SGSL (snow grain size of shallow layer) |
Snow grain size of shallow layer |
SGSL |
SGSL_AVE |
|
SIST (snow and ice surface temperature) |
Snow and ice surface temperature |
SIST |
SIST_AVE |
|
SALB (snow and ice blue-sky albedo) |
Snow and ice blue-sky albedo |
SALB |
SALB_AVE |
|
| Level-3 | SICE (Snow and Ice covered area) |
Snow and Ice covered area |
SICE |
SICE_AVE |
SGSL (snow grain size of shallow layer) |
Snow grain size of shallow layer |
SGSL |
SGSL_AVE |
|
SIST (snow and ice surface temperature) |
Snow and ice surface temperature |
SIST |
SIST_AVE |
7) Converting to a physical quantity
When converted to GeoTIFF using the SGLI Map projection & GeoTIFF conversion tool, the coefficients (slope/offset) of the geophysical conversion are output to an XML file created at the same time.
Display in a text editor or browser.
Below is an example of SIST XML.
Substitute the values of <Slope> and <Offset> into the formulas in <Data_description> to convert pixel values into physical quantities.
<Data_description>Snow and ice surface temperature based on model snow (SIST): SIST = slope*DN + offset</Data_description>
<Slope>5.525000e-004</Slope>
<Offset>2.400000e+002</Offset>
the gdal command is used, the values converted with the following command are stored.
The Slope and offset values can be left as "5.525000e-004 and 2.400000e+002".
>gdal_calc -A input.tif --outfile=output.tif --type=Float32 --calc="A * 0.0005525 + 240" --NoDataValue=65535
8) Checking the data quality flag (QA Flag)
Product quality flags (QA_Flag) are stored as 16- or 8-bit ON (1) and OFF (0) information.
Product quality information can be found in the "QA_flag information" section of each product page on the "Standard Products & Algorithms" (https://suzaku.eorc.jaxa.jp/GCOM_C/data/product_std.html) website.
| Bit No. | 15 | 14 | 13 | 12 | 11 | 10 | 9 | 8 | 7 | 6 | 5 | 4 | 3 | 2 | 1 | 0 |
|---|---|---|---|---|---|---|---|---|---|---|---|---|---|---|---|---|
| Example | 0 | 1 | 0 | 0 | 0 | 0 | 0 | 1 | 0 | 0 | 0 | 0 | 0 | 0 | 0 | 0 |
9) GeoTIFF Tag Information
| Classification | Tag ID | Name | Definition/Value | |
|---|---|---|---|---|
| TIFF Field | 258 |
BitPerSample |
Number of bits per component. |
8 or 16 32(when converting physical quantity) |
259 |
Compression |
Compression method |
1: No compression 5: LZW(when compression is specified) |
|
257 |
ImageLength |
Image length |
Height (vertical length) of an image expressed in line units. |
|
256 |
ImageWidth |
Image width |
Width (horizontal length) of an image expressed in pixel units. |
|
274 |
Orientation |
Scanning orientation |
1: TopLeft(The image is stored as it is shown) |
|
262 |
PhotometricInterpretation |
Photometric type |
1: BlackIsZero(Display 0 in grayscale image as black) |
|
284 |
PlanarConfiguration |
Order of storing image data |
1: Pixel priority mode (pixel-by-pixel) e.g.RGBRGBRGB…… 2: Plane priority mode (plane-by-plane) e.g.RRR……GGG……BBB…… |
|
339 |
SampleFormat |
Type of data |
1: Unsigned integer data 3: single precision floating point number (when converting physical quantity) |
|
277 |
SamplesPerPixel |
Number of samples per pixel |
Number of stored channels/band |
|
278 |
RowsPerStrip |
The number of lines per strip |
The number of lines of image data per strip. |
|
42112 |
GDAL_METADATA |
GDAL_METADATA |
The slope and offset values are stored according to the settings. |
|
42113 |
GDAL_NODATA |
GDAL_NODATA |
Used in the GDAL library and treated as transparent. |
|
| GeoKey | 34735 |
GeoKeyDirectoryTag |
GeoKey Directory |
Store GeoKey directory |
34736 |
GeoDoubleParamsTag |
GeoDouble parameter |
Stores double-valued GeoKeys |
|
34737 |
GeoAsciiParamsTag |
GeoAscii Parameters |
Stores ASCII-valued GeoKeys |
|
33922 |
ModelTiepointTag |
Tie point |
Tie point information(I,J,K,X,Y,Z). Image position (I,J,K) and geographic coordinates (X,Y,Z) |
|
33550 |
ModelPixelScaleTag |
Pixel scale in map linear units per pixel |
Horizontal and vertical pixel spacing (ScaleX, ScaleY, ScaleZ) |
|
1024 |
GTModelTypeGeoKey |
Type of geographic coordinate information |
1: ModelTypeProjected(Projected coordinate system) 2: ModelTypeGeographic(Latitude-longitude coordinate system) |
|
1025 |
GTRasterTypeGeoKey |
Type of raster |
1: RasterPixelIsArea (One pixel represents an area in the real world) |
|
1026 |
GTCitationGeoKey |
CRS Citation |
Geographic (Lat/Lon) / WGS84 PS / WGS84 (When PS is selected) |
|
2054 |
GeogAngularUnitsGeoKey |
Coordinate unit(angle) identification code. |
9102: Degree |
|
2048 |
GeographicTypeGeoKey |
Type of coordinate system |
4326: WGS84 |
|
2049 |
GeogCitationGeoKey |
Geographic coordinate system citation |
WGS 84 (When converted by gdal) |
|
3072 |
ProjectedCSTypeGeoKey |
Projected coordinate reference system |
32767 : User-defined (When PS is selected) |
|
3073 |
PCSCitationGeoKey |
Projection citation |
Geographic (Lat/Lon) / WGS84 PS / WGS84 (When PS is selected) |
|
3074 |
ProjectionGeoKey |
Projection method |
32767: User-defined (When PS is selected) |
|
3075 |
ProjCoordTransGeoKey |
Coordinate transformation method |
15: CT_PolarStereographic (When PS is selected) |
|
3076 |
ProjLinearUnitsGeoKey |
Linear unit |
9001: Linear_Meter (When PS is selected) |
|
3081 |
ProjNatOriginLatGeoKey |
Latitude of map-projection Natural origin |
71(Northern hemisphere), -71(Southern hemisphere) (When PS is selected) |
|
3082 |
ProjFalseEastingGeoKey |
Gives the easting coordinate of the map projection Natural origin |
0 (When PS is selected) |
|
3083 |
ProjFalseNorthingGeoKey |
Gives the northing coordinate of the map projection Natural origin |
0 (When PS is selected) |
|
3095 |
ProjStraightVertPoleLongGeoKey |
Longitude at Straight Vertical Pole. For polar stereographic |
0 (When PS is selected) |
|